Table of contents
- 0. Quick Facts
- 1. What Makes the Daubenhorn Unique
- 2. Who This Route Is For (and Who Should NOT Do It)
- 3. Prerequisite Via Ferratas You Should Have Done First (Europe)
- 4. Best Time to Go & When You Should NOT Be on the Mountain
- 5. Logistics Overview (Big Picture Planning)
- 6. Where to Stay: Accommodation Options & Cost Comparison
- 7. Parking in Leukerbad (What Actually Works)
- 8. Gear & Equipment (Daubenhorn-Specific, No Guesswork)
- 9. Route Breakdown – Stage by Stage (Topo, Timing & Descent)
- 10. Safety, Rescue & Insurance (What Actually Matters on Daubenhorn)
- Before You Go: Download the Daubenhorn Checklist & GPX (Free)
0. Quick Facts
- Route: Daubenhorn
- Location: Leukerbad, Switzerland
- Via ferrata grade: K5–K6 / ED (Extremely Difficult)
- Ferrata length: ~2 km of steel cable
- Ladders: 200+ vertical meters
- Total time: 6–8+ hours (can be longer with crowds)
- Elevation: approx. 2941 m summit
- Best season: mid-June to late September (conditions dependent on snow melt)
- Recommended days: Weekdays only (Weekends if you like queuing)
- Not suitable for: beginners, first ferrata, people afraid of exposure, or anyone relying on “I’ll just power through”
One-sentence summary:
This is not a “hard ferrata with one crux.” This is a full-day, sustained, physically and mentally draining alpine route where mistakes compound fast.
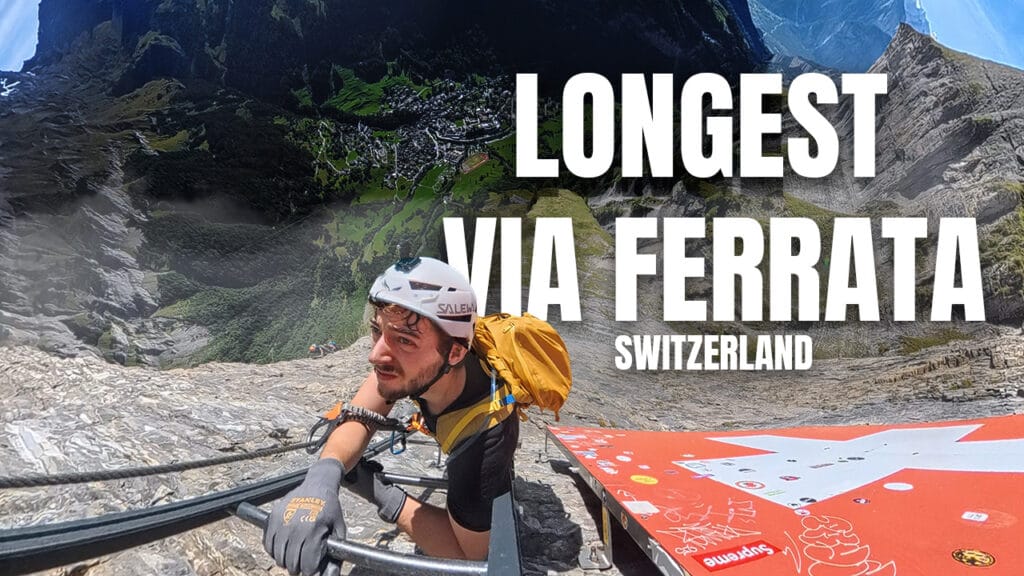
0.1 Watch: My Full Daubenhorn Via Ferrata Experience
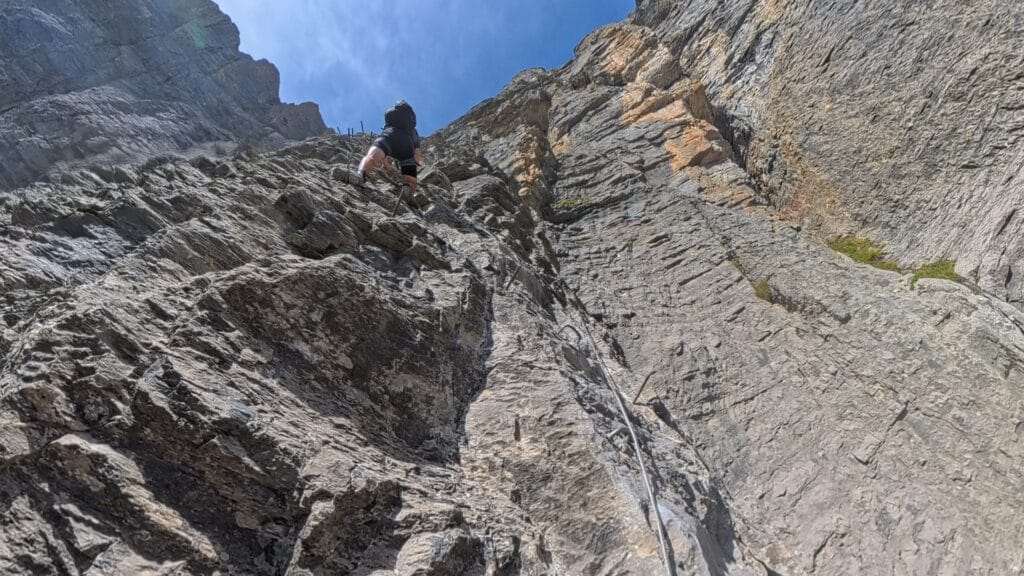
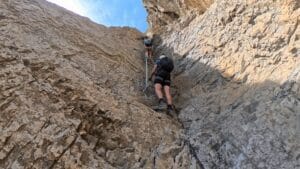
This guide covers the what, why, and how — but the video below shows what the Daubenhorn actually feels like:
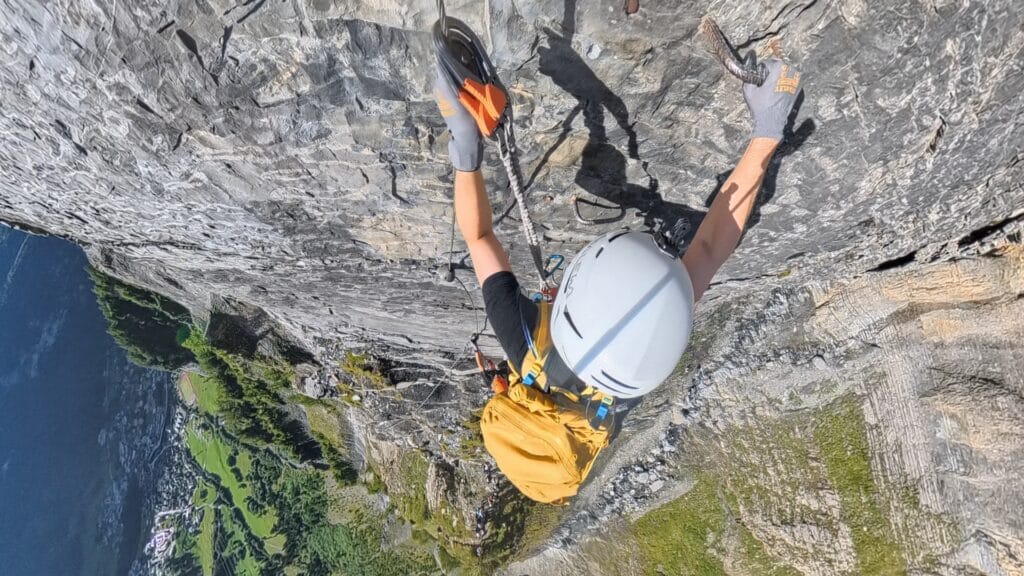
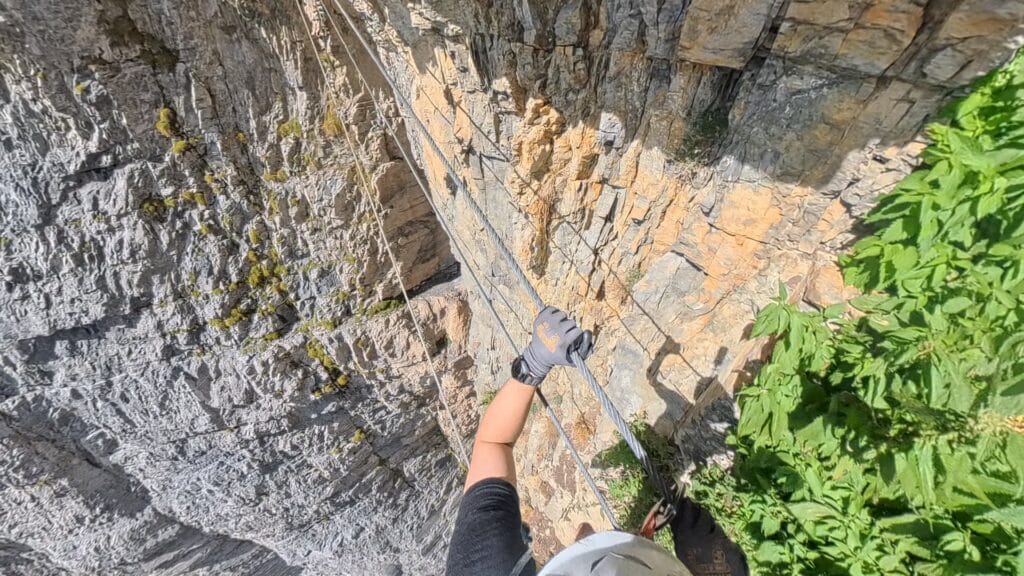
- The length and exposure of the ladders
- The crowding and waiting on vertical terrain
- The bridge and cave sections
- How fatigue builds late in the route
- Why the bailout decision matters
- Mistakes made by myself; and exactly why you should study this guide carefully to avoid them
This was not a perfect day (I have learned a lot about my mistake, and incorporated this into the guide) — and that’s exactly why it’s worth watching.
If you want to understand whether the Daubenhorn is right for you,
watch this before you commit.
1. What Makes the Daubenhorn Unique
There are harder moves on other via ferratas in Europe. There are more exposed moments elsewhere. There are even ferratas with scarier single sections. But what makes the Daubenhorn different is how long it keeps asking the same hard question:
Can you keep going — safely — for hours?
1.1 It’s not hard once — it’s hard all day
Many ferratas follow this pattern:
- Easy approach
- One difficult crux
- Easier terrain to the top
Daubenhorn doesn’t. Instead, it delivers:
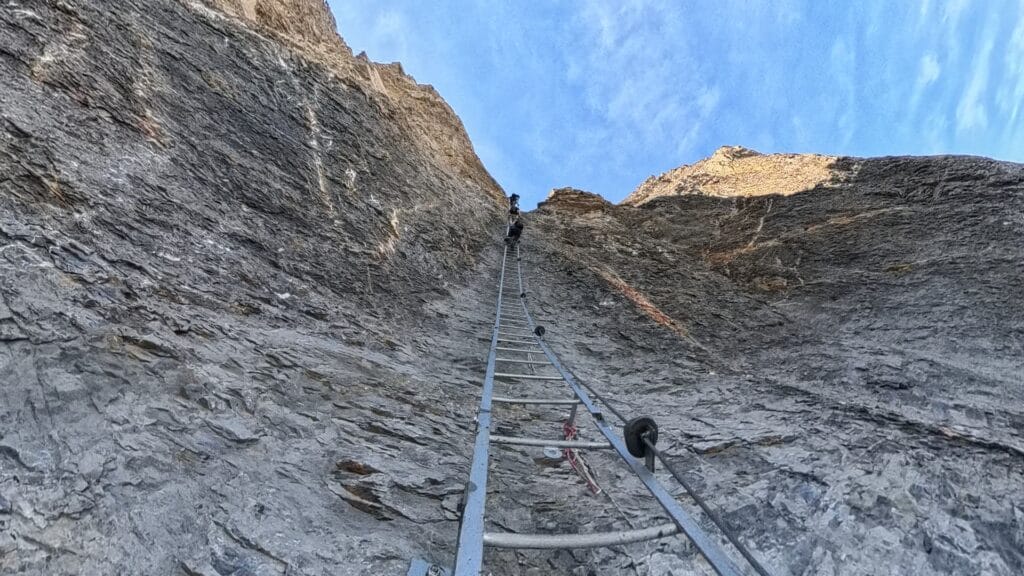
- Stage after stage of vertical climbing
- Repeated long ladder systems
- Constant clipping and unclipping
- Very few real “reset” moments
Even strong climbers underestimate how much cumulative fatigue matters here. Grip, shoulders, forearms, calves, and mental focus all degrade slowly — and once they’re gone, there’s no shortcut.
1.2 Waiting is part of the difficulty
On Daubenhorn, crowding doesn’t just slow you down — it actively makes the route harder. Waiting often means:
- Hanging in your harness
- Resting on a single arm
- Standing on ladder rungs with burning calves
- Staying clipped into a vertical wall for minutes at a time
This is why:
- Rest lanyards are essential
- Weekends are a bad idea
- Starting early matters more here than on almost any other ferrata
A route that might feel “manageable” when moving continuously becomes brutal when movement stops.
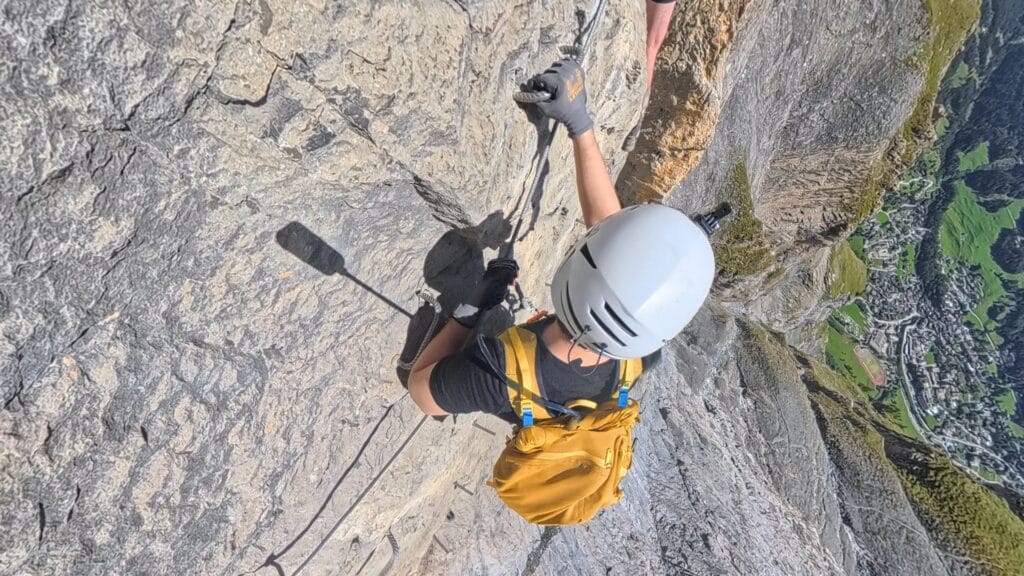
1.3 The mental load never drops
From the approach onward, the route constantly applies pressure:
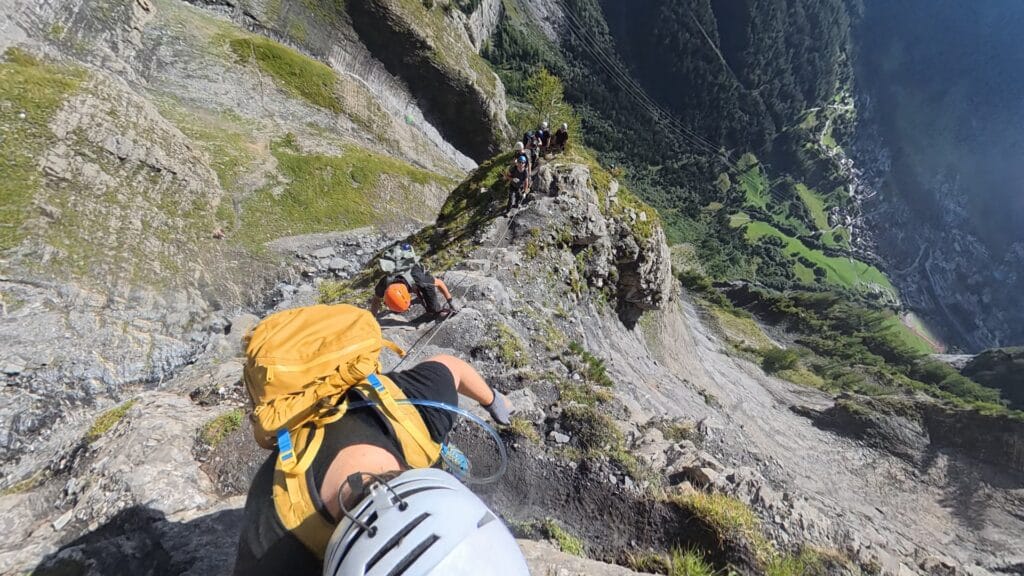
- Narrow paths with serious drops
- Long sections where you can’t see the end
- Exposure that doesn’t let up
- A growing awareness that bailing later will be worse than bailing early
This is not a route where you “relax into it” after the first hour. Your brain is working the entire day. That’s why many climbers report the same thing:
- During the climb: “Why am I doing this?”
- A few days later: “One of the best days of my life.”
1.4 There is only one bailout option – and you should seriously consider it
Most via ferratas:
- Are either easy to escape early, or
- Don’t offer a meaningful bailout at all
Daubenhorn gives you only one true decision point after the first stage. That’s unusual — and important.
It also means:
- The route expects you to self-assess honestly
- The mountain does not forgive ego-based decisions
This guide will repeat this often because it matters:
If the first section feels hard, the second will feel impossible.
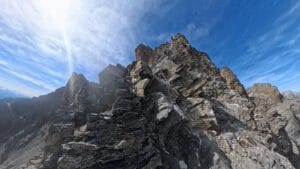
1.5 It’s an alpine route, not a theme park
Despite being well-equipped with steel cable, this is still an alpine environment:
- Rockfall is possible (I witnessed this first hand)
- Weather changes fast (Always check the forecast before attempting)
- Snow can linger on the descent
- Navigation matters after the ferrata ends
The steel does not make it safe by default. It just makes it climbable.
Why people underestimate it:
Most failures on Daubenhorn don’t come from:
- Lack of courage
- Fear of heights
- One single technical move
They come from:
- Poor pacing
- Not eating or drinking enough (My personal issue on my attempt)
- Underestimating waiting time (Guilty of this)
- Overestimating upper-body endurance
- Starting too late or on the wrong day (I will never consider doing this on the weekend again)
This guide exists to prevent exactly that. And to help you prevent making the same mistake as me
2. Who This Route Is For (and Who Should NOT Do It)
Let’s get very clear here. The Daubenhorn doesn’t fail people because they’re weak or scared.
It fails people because they misjudge themselves. This section exists to help you decide before you’re hanging six hours deep on a vertical wall, asking yourself why you didn’t turn around earlier.
2.1 This route IS for you if…
You’re a good candidate for Daubenhorn if most of the following are true:
- You’ve already completed multiple K4 / C–D via ferratas without panic or total exhaustion (Examples in the next section)
- You’re comfortable on long vertical ladders where legs burn and arms must stay relaxed
- You can manage exposure for hours, not just short sections
- You’ve done at least one full-day alpine objective (6–8 hours) where the descent still required focus (Examples in the next section)
- You understand that waiting = effort on via ferratas
- You’re willing to bail early if something feels off
Most importantly:
You’re here for a good decision, not an ego result. (Even though this is a personal struggle of myself)
2.2 This route is NOT for you if…
Daubenhorn is a bad idea if any of the following apply:
- This would be your first via ferrata
- Your experience is limited to short, sporty ferratas (30–90 minutes)
- You struggle to eat or drink when stressed (eating is my main issue)
- You freeze when exposed or rush when scared
- You rely on “I’ll just power through” as a strategy
- You’ve never had to hang on your arms for extended periods
- You’re uncomfortable turning around when others continue
This route does not reward stubbornness. It punishes it.
2.3 The “overconfident climber” trap
One of the most common Daubenhorn profiles looks like this:
- Strong in the gym
- Good general fitness
- Confident mover
- Little experience with sustained exposure + waiting
This person often (this was me on my attempt):
- Flies through the first section
- Starts burning out on ladders
- Gets stuck waiting in queues
- Stops eating and drinking
- Loses arm strength before the hardest terrain
Daubenhorn doesn’t care how strong you are fresh. It cares how well you function six hours in.
2.4 Mental readiness matters more than hype
This route demands:
- Calm clipping under fatigue
- Controlled breathing while exposed
- Patience in queues
- The ability to slow down when everyone behind you wants to rush
If you:
- Feel pressured by people behind you
- Make worse decisions when watched
- Rush clips when stressed
Then Daubenhorn will amplify those weaknesses.
2.5 The honest self-check (read this twice)
Before committing, ask yourself:
- Can I hang comfortably on a cable without panicking?
- Can I stop, rest, and eat while clipped in?
- Can I accept turning around even after months of planning?
- Can I descend safely when completely exhausted?
If any answer is “maybe” — that’s not a no. But it is a reason to:
- Start earlier
- Go mid-week
- Choose conservative options
- Respect the bailout
2.6 Why the bailout exists (and why you should respect it)
Daubenhorn gives you one real exit after the first major section. That’s not kindness — it’s design. It’s there because:
- The route becomes significantly more physical
- Retreat later is impossible without a helicopter rescue
- Fatigue compounds fast
This guide will repeat this often because it matters:
If you struggle early, the mountain is giving you an answer.
Bottom line
Daubenhorn is not about proving anything.
It’s about stacking good decisions all day long.
If that sounds appealing — you’re probably ready.
If it sounds annoying — this might not be your route.
3. Prerequisite Via Ferratas You Should Have Done First (Europe)
Before you attempt the Daubenhorn, you should have a progressive background in via ferratas that train three very specific things:
- Exposure tolerance over time
- Sustained ladder and vertical terrain
- Endurance while clipped in (including waiting)
Doing “something hard once” is not enough. The goal is to arrive at Daubenhorn already knowing how your body and mind react after several hours of ferrata movement. Below is a realistic progression, with concrete European examples and why they matter.
3.1 Level 1 – Exposure & Movement Confidence (K2–K3)
Goal: feel relaxed on cables, ladders, and exposed traverses.
These routes are not physically extreme, but they teach you how to:
- Clip smoothly
- Move efficiently on steel
- Stay calm with air under your feet
Recommended routes:
- Mürren–Gimmelwald Via Ferrata (Switzerland)
- Length: ~2.2 km
- Time: ~1.5–3 h
- Grade: K2–K3
- Why it matters: Long exposure with manageable difficulty. Perfect for learning flow without panic.
- Klettersteig Pinut (Switzerland)
- Time: ~2–3 h
- Grade: K3
- Why it matters: Steep enough to require focus, but short enough to stay controlled.
👉 If exposure alone already stresses you here, Daubenhorn will be mentally overwhelming.
3.2 Level 2 – Sustained Steepness & Ladders (K4–K4+)
Goal: learn how your arms and legs behave on long ladder systems.
This is where many people realize ferrata fitness ≠ gym fitness.
Recommended routes:
- Allmenalp Via Ferrata (Switzerland)
- Ferrata length: ~650 m
- Time: ~2–3 h
- Grade: K4+
- Why it matters: Continuous vertical terrain, long ladders, little “free recovery.”
👉 If you come off these routes with severe arm pump or shaky legs, Daubenhorn will amplify that by 3–4×.
3.3 Level 3 – Long Alpine Ferrata Days (C/D – D)
Goal: handle fatigue, exposure, and descent after a long day.
These routes teach what most short ferratas don’t:
- Eating and drinking under stress
- Managing energy over 6–8 hours
- Descending safely when tired
Recommended routes:
- Intersport Klettersteig Donnerkogel (Austria)
- Ferrata length: ~1.2 km
- Grade: C/D
- Why it matters: Ladder-heavy, popular (queues!), and long enough to teach patience.
- Bocchette Centrali (Italy); Read more about it in my guide
- Ferrata time: ~4 h
- Full day: often 6–8+ h including approach/descent
- Why it matters: Sustained exposure with real alpine commitment.
- If you want a detailed, practical breakdown of this route — including huts, logistics, gear mistakes, and how it actually feels after multiple days on ferrata — check out my Brenta Dolomites Hut-to-Hut Guide, where Bocchette Centrali is covered step by step from real experience.
👉 If you’ve never finished a long day thinking “the descent still matters”, Daubenhorn will be a shock.
3.4 Level 4 – Sustained Hard Ferratas (D–E)
Goal: prepare your upper body and mind for Daubenhorn’s second stage.
These routes are closer in physical demand, though still usually shorter.
Recommended routes:
- Dachstein Super Ferrata (Austria)
- Length: ~1.8 km
- Grade: D/E
- Why it matters: Long, physical, and mentally draining.
👉 Even after these, Daubenhorn will still feel harder — mainly because it lasts longer.
3.5 The minimum experience bar (be honest)
Before attempting Daubenhorn, you should be able to say:
- “I’ve done multiple K4+ ferratas comfortably.”
- “I’ve completed at least one 6–8 hour alpine day.”
- “I know how my body reacts when I’m tired and exposed.”
- “I can rest clipped in without panicking.”
If not — that’s not failure. It just means you’re early in the progression, not late.
4. Best Time to Go & When You Should NOT Be on the Mountain
Timing is not a “nice to have” on the Daubenhorn. It directly determines whether your day feels challenging but controlled or chaotic and dangerous. This section matters more than people think — especially if you’re strong enough to get yourself into trouble.
4.1 Official season window (and what it actually means)
- Typical season: mid / late June → late September
- Why this varies every year (Check the website for update on the opening date):
- Snowpack from winter
- How fast the glacier and descent clear
- Spring temperatures and freeze–thaw cycles
Early in the season:
- The ferrata itself may be dry
- The descent can still hold snow
- Navigation becomes harder
- Crampons may be required (more on that later)
Late in the season:
- Shorter daylight
- Colder mornings
- Higher chance of wet or icy sections after cold nights
👉 Late June to mid-September is usually the sweet spot, if conditions are stable.
4.2 Why weekdays are strongly recommended
This cannot be overstated. On Daubenhorn:
- Crowds don’t just slow you down
- They actively increase fatigue and risk
On busy days, waiting often means:
- Hanging on your arms
- Standing on ladder rungs with burning calves
- Staying clipped into a vertical wall for minutes at a time
This leads to:
- Early arm pump
- Poor clipping decisions
- Skipped food and water
- Increased rockfall exposure from climbers above
Reality check:
- Saturday = worst day
- Sunday = slightly better
- Tuesday–Thursday = ideal
If you can only go on a weekend, you should:
- Start as early as possible (more tips for this in the next section)
- Be extra strict with pacing
- Be mentally prepared to bail earlier than planned
4.3 Why weather matters more here than on most ferratas
Daubenhorn is:
- Long
- Exposed
- High
- Fully committed once you pass the bailout
This combination makes weather mistakes expensive.
Thunderstorms – Absolute no-go.
- Steel cables + exposure = lightning risk
- Rain turns the approach and bailout into hazards
- Waiting on metal ladders in a storm is a nightmare scenario
If thunderstorms are forecast anywhere near the afternoon, don’t go.
Rain & wet rock – Even light rain changes the character of the route:
- Slippery ladders
- Wet holds in the cave
- Much more dangerous bailout descent
This route is not recommended in wet conditions; this is the same for the bailout. DO NOT ATTEMPT IF THERE IS ANY CHANCE OF RAIN
👉 You can check the weather forecast on MeteoBlue
Wind
- Makes the bridge significantly harder
- Increases fatigue on ladders
- Amplifies fear and poor decision-making
If the forecast shows strong gusts at altitude, reconsider.
Cold & overnight freeze – might result in:
- Icy cables in shaded sections
- Hard snow on the descent
- Slower movement early in the day
Not necessarily a dealbreaker — but it changes gear and timing requirements.
4.4 Snow: the hidden dealbreaker
This catches many people off guard. Even when:
- The ferrata is completely dry
- The approach looks fine
There may still be:
- Snowfields on the descent
- Hard, icy patches early in the morning
If snow is present (check this with the Cable car station):
- You may need crampons to descend safely
- Route-finding becomes harder
- The day becomes significantly more alpine
If you’re not comfortable with:
- Snow travel
- Foot placement on hard snow
- Navigation when trails disappear
Then early season is not for you.
4.5 Time of day: why early starts win
Daubenhorn rewards early starts more than almost any ferrata in Switzerland. Starting early means:
- Cooler temperatures
- Less crowding
- More margin for delays
- Better decision-making under less stress
Starting late means:
- More queues
- More fatigue before the crux sections
- Rushing the descent to catch the last cable car
This is why sleeping at Gemmi (or being first on the cable car) is such a big advantage — we’ll break that down fully in the logistics section.
4.6 When you should turn around before even starting
Do not start the route if:
- Thunderstorms are forecast later in the day
- Rain is expected
- Winds are strong at altitude
- You already feel rushed at the base
- You’re behind schedule before clipping in
This route has no interest in your plans. It only reacts to conditions.
Key takeaway
The Daubenhorn isn’t hard because of one scary move.
It’s hard because everything stacks:
- Time
- Weather
- Crowds
- Fatigue
5. Logistics Overview (Big Picture Planning)
Before we zoom in on start times, parking, cable cars, and accommodation, you need a clear mental model of how a Daubenhorn day actually works.
5.1 Where everything happens
The entire route revolves around three key places:
- Leukerbad – where you arrive, park, and sleep if you stay in the valley
- Gemmipass (Gemmi Pass, ~2350 m) – the high plateau where the approach starts
- Daubenhorn – the objective itself
Your entire logistical strategy is about how early, relaxed, and uncrowded you reach the start of the ferrata.
5.2 The three realistic logistics setups
There are only three ways to plan Daubenhorn. One of them is clearly superior for most people.
Option 1 – Sleep at Gemmi (RECOMMENDED)
Stay at Gemmi Lodge 2350.
Why I strongly recommend staying 2 nights here
Staying two nights at Gemmi is the most relaxed and safest way to do Daubenhorn. It gives you:
- No stress about the last cable car after a long, exhausting day (just make sure you are on time for dinner: 18:45)
- The option to wait out bad weather and climb on Day 2 (luggage can be stored in the hut)
- A proper recovery evening instead of racing downhill
- The ability to start before the first cable car even arrives
This turns Daubenhorn from a “tight schedule objective” into a controlled alpine experience. Start-time advantage (this is huge)
If you sleep at Gemmi:
- You can start before 08:00 (breakfast at 07:00; leave the pass at 07:30
- The first public cable car starts at 08:00 (arriving only 6 minutes later)
- That means you will 100% be the first party on the route
On Daubenhorn, being first is not a luxury — it’s a massive advantage:
- No queues
- No hanging waits
- No rockfall from people above
- Far less arm fatigue
This alone can be the difference between “hard but amazing” and “survival mode”.
Option 2 – Sleep in Leukerbad & take the first cable car
This is the most common setup — and the most crowded.
Cable car schedule (summer peak): 08:00 – 18:00 (every 30 minutes)
If you sleep in the valley:
- Everyone targets that 08:00 first lift
- You will start the approach with a crowd
- You are much more likely to encounter queues on the ferrata
This option works only if:
- You’re very efficient
- You move fast from the top station
- You accept that you may need to bail earlier if queues explode
Cable car prices (latest on the website):
| One-way | Return | |
|---|---|---|
| Adultes without Leukerbad Guest | 30 CHF | 42 CHF |
| Adultes with Leukerbad Guest (you get this with staying in Leukerbad) | 27 CHF | 36 CHF |
Option 3 – Start from the valley on foot (NOT recommended)
Technically possible, but rarely smart.
What this actually adds
Starting from Leukerbad (~1410 m) instead of Gemmi (~2350 m) adds approximately:
- +/-900 m elevation gain
- +1–1,5 hours before you even reach the ferrata start
- Significant additional fatigue before the hardest climbing begins
You effectively turn Daubenhorn into:
- A massive endurance day
- With less margin for queues, weather, or mistakes
Unless you’re specifically training for long alpine link-ups, or want to save 30 CHF on the cable car this option offers no real benefit.
5.3 Why sleeping at Gemmi changes everything
Sleeping high gives you:
- A head start instead of a race
- Time buffers for weather or fatigue
- A backup day if conditions are bad
- A relaxed finish without watching the clock
Key takeaway
If you want the best possible Daubenhorn experience:
- Stay at Gemmi
- Stay two nights
- Start before 08:00
- Be first on the wall
6. Where to Stay: Accommodation Options & Cost Comparison
By now, the logistics and start-time advantages are clear. This section focuses purely on where you sleep, what it costs, and what kind of experience each option gives you.
6.1 Staying at Gemmi (High Camp / Lodge Option)
Staying at Gemmi Lodge 2350 is the most efficient base for Daubenhorn.
What this stay is like
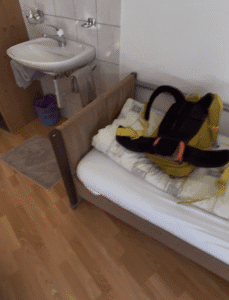
- Quiet alpine setting at ~2350 m
- Early nights, calm atmosphere
- Most guests are hikers or climbers
- Everything is structured around mountain days
- Towels and bedsheets are washed and included (not the case for most huts)
This fits the rhythm Daubenhorn demands.
Two-night strategy
- Day 1: arrive, relax, acclimatise
- Day 2: climb Daubenhorn
- No stress about missing the last cable car
- Backup day if weather is bad
This dramatically improves decision-making and safety.
Food & hut logistics
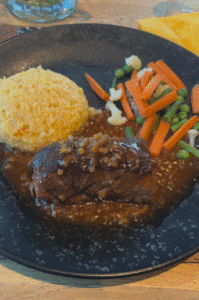
- Dinner: 18:45
- Breakfast: 07:00–09:00
- Early departure possible if arranged the evening before
Estimated cost (Gemmi Lodge)
- CHF 110–130 per person per night (half board: dinner + breakfast)
- Cable car arrival & departure included for hotel guests (36 CHF value)
Total (2 nights):
- ~CHF 220–260 per person
- Includes: accommodation, dinners, breakfasts, cable car
- Cancelation is possible up to 3 days before your arrival, in case of bad weather
👉 For a long ferrata, this is excellent value for the margin it gives you.
6.2 Sleeping in Leukerbad (Valley Option – Hotels & Apartments)
Sleeping in Leukerbad gives the widest choice and flexibility.
What you get
- Budget rooms → spa hotels
- Restaurants, supermarkets, thermal baths
- Easier cancellation if weather changes
- Gemmi Lodge is fully booked for you dates.
Booking accommodation
For flexibility and easy comparison, I recommend using Booking.com, where you can:
- Check the distance to the Gemmi cable car
- Select free cancellation (in case of bad weather)
- Compare prices easily
Estimated cost per person (Leukerbad)
- Accommodation: CHF 80–150 per night
- Dinner: CHF 20–40 (can be cheaper if you bring your own groceries)
- Breakfast: CHF 10–20
- Cable car (return): CHF 36–42
Total (1 night):
- ~CHF 150–250 per person
Total (2 nights):
- ~CHF 250–400 per person
Valley stays are comfortable — but you pay extra for food and lifts, and you lose some flexibility.
6.3 Camping (Budget & Flexibility Option)
Camping is a valid option if you’re on a budget or travelling by van — but it comes with important caveats.
Camping in/near Leukerbad
- Wild camping is not allowed in the area
- You must use an official campsite nearby
The best camping spot in Leukerbad (since it is close to the cable car) is Camping Leukerbad.
What to expect
- Very budget-friendly
- Less recovery comfort
- Early mornings required
- Weather impacts you more directly
Camping works best if:
- You’re used to early alpine starts
- You don’t mind basic recovery
- You’re flexible with plans
Estimated cost (Camping)
- Campsite: CHF 15– per person per night
- Food (self-catered): CHF 15–25 per day
- Cable car (return): CHF 36–42
Total costs camping in Leukerbad:
- Total (1 night): ~CHF 70–100 per person
- Total (2 nights): ~CHF 100–160 per person
- Budget-friendly, but with less margin and comfort.
6.4 Quick Cost Comparison
| Option | Nights | Approx. Total Cost (p.p.) | Best For |
|---|---|---|---|
| Gemmi Lodge | 2 | CHF 220–260 | Best experience, maximum margin |
| Leukerbad (budget hotel) | 2 | CHF 150–250 | Comfort + flexibility |
| Leukerbad (mid hotel) | 2 | CHF 250–400 | Spa/recovery focus |
| Camping | 2 | CHF 70–160 | Budget travellers |
Key takeaway
- Best overall value & experience: Gemmi Lodge (2 nights)
- Most flexibility: Leukerbad hotels
- Cheapest: Camping (with trade-offs)
On a route as long and demanding as Daubenhorn, spending a bit more for time, flexibility, and recovery is usually money well spent.
7. Parking in Leukerbad (What Actually Works)
Parking in Leukerbad is simple if you know where to go — and annoying if you don’t. Leukerbad is partially car-restricted, and on busy days you don’t want to be circling the village looking for signs while the clock is ticking. This section gives you reliable, low-stress options, not theoretical ones.
7.1 Best option: Hotel parking (if available)
If your hotel or apartment in Leukerbad offers private parking, this is often the best option. Why this can be ideal:
- Guaranteed spot — no searching in the morning
- No uncertainty about availability
- You can leave your car parked for the entire stay
- Especially convenient if you’re staying multiple nights
If your accommodation does not offer parking, move to the options below.
7.2 Best public option: Parking at the Gemmi cable car (recommended)
If you don’t have hotel parking (or staying. at the Gemmi Lodge), the most practical public option is right next to the Gemmi cable car valley station. Why this is the best public choice
- Closest parking to your point of return
- No extra walking at the end of a very long day
- Direct access to the cable car
- Easy to find, well signposted
7.3 Other official parking options in Leukerbad
If parking near the Gemmi cable car is full, these are the main alternatives:
- Sportarena Parking Garage
- Rathaus Parking Garage
- Torrent Parking
All are official, paid parking options within Leukerbad. They work fine, but may add:
- Extra walking
- Slightly more navigation through the village
They’re acceptable backups — just less convenient when you’re exhausted.
7.5 Parking strategy by accommodation type
- Hotel with parking:
Use it. It’s usually the simplest and least stressful solution. - Hotel without parking / apartment:
Park at or near the Gemmi cable car early. - Staying outside Leukerbad:
Factor in driving time and arrive early enough to park without stress.
8. Gear & Equipment (Daubenhorn-Specific, No Guesswork)
The Daubenhorn is not a route where “standard ferrata gear” is enough by default. What matters here is duration, waiting time, and cumulative fatigue. This section focuses on what actually makes a difference on this route, not generic packing lists.
8.1 Mandatory via ferrata gear (non-negotiable)
You must have all of the following:
Helmet
- Rockfall is possible
- Dropped items from climbers above are common on busy days
Recommendations (all of these are safe, difference is mainly weight)
- Budget: Decathlon Simond Rock
- Mid-range: Petzl Boreo / Black Diamond Half Dome (affiliate link)
- High-end: Petzl Meteor (affiliate link)
Harness – Comfort matters here — you may hang in it for long periods.
Recommendations
- Budget: Decathlon Simond Rock
- Mid-range: Black Diamond Momentum (affiliate link)
- High-end: Petzl Sitta (affiliate link)
Via ferrata set (energy absorber + 2 carabiners) – Certified, modern system only. No shortcuts.
Recommendations
- Budget: SALEWA Premium Attac Via Ferrata Set (affiliate link)
- Mid-range: Petzl Scorpio Easyhook (affiliate link)
- High-end: Petzl Scorpio Eashook SW (affiliate link)
Rest system (MANDATORY on Daubenhorn)
This is not optional on this route. Because of queues and long vertical sections, you must be able to:
- Clip in
- Sit back in your harness
- Fully relax your arms
Acceptable options
- Budget: 60–120 cm sling + locking carabiner (affiliate link)
- High-end: Petzl Connect Adjust (affiliate link)
Without a rest system:
- Waiting = hanging on arms
- Hanging = rapid forearm pump
- Pump = bad clipping + early bailout
On Daubenhorn, this will happen unless you are first on the route.
Gloves – Your hands will be on steel for hours.
Recommendations
- Budget: Gardening gloves (affiliate link)
- Mid-range: Black Diamond Crag (affiliate link)
8.2 Footwear
Choose stability and edging over minimal weight. Most important is the fit for these, recommended to try them in store.
Recommended
- Stiff hiking boots or solid approach shoes
- Secure heel
- Good edging on ladder rungs
Examples
- Budget: Salomon X Ultra (boot version) (affiliate link)
- Mid-range: La Sportiva TX4 / Scarpa Mescalito (affiliate link)
- High-end: Scarpa Ribelle Lite (crampon compatible) (affiliate link)
Not recommended
- Soft trail runners
- Minimalist shoes
- Anything you’ve never worn on ladders
Standing on ladder rungs for minutes at a time punishes soft shoes.
8.3 Crampons
You need to bring these on your trip even if it is late in the season, you can check with the lift if it is required to actually carry these with you. But bringing them is about safety
Recommended:
- Crampons are required early in the season; You will need to cross a small glacier
- Crampons require stiff soles on your shoes; make sure your crampons and shoes are compatible
- Microspikes can be good enough if you go late in the season and only need to cross small snow patches
Examples:
- Budget: Microspikes (affiliate link)
- High-end: Grivel G12 (affiliate link)
8.4 Backpack
- 20–25 L (no bigger; at least not filled any more)
- Slim profile
- Chest strap recommended
Examples
- Budget: Decathlon MH500
- Mid-range: Deuter Speed Lite 23 (affiliate link)
- High-end: Mammut Trion Light 28 (packed light) (affiliate link)
If your pack pulls you backward while clipped in, it’s too big or badly packed.
8.5 Clothing & layer system (specific and proven)
Daubenhorn is long, exposed, and windy. Dress to adapt, not to look good.
Base layer
Breathable, fast-drying.
- Budget: Decathlon synthetic base layer
- Mid-range: Patagonia Capilene / Odlo Performance
- High-end: Merino blend (Icebreaker / Ortovox)
Mid layer (insulation)
Light but warm — essential for waiting.
- Budget: Decathlon synthetic fleece
- Mid-range: Patagonia R1 / Arc’teryx Delta
- High-end: Ortovox Grid Fleece / Alpha Direct pieces
Wind/rain layer (CRUCIAL)
This matters more than insulation on ladders and the bridge.
- Budget: Decathlon windbreaker
- Mid-range: Patagonia Houdini (affiliate link)
- High-end: Arc’teryx Squamish (affiliate link)
Even on warm days, wind + exposure + waiting = cold.
Lower body
- Stretchy hiking pants
- Optional thin thermal layer early season
Avoid shorts unless you enjoy scraped shins on ladders.
8.6 Water & hydration
This route has no reliable water sources on the ferrata.
How much to carry
- 2.5 – 3.0 liters minimum
- Electrolytes strongly recommended
- Camelbak (affiliate link) is cheat code for hydrating on via ferrata’s
On-route refilling
- Glacier runoff may be available on the descent
- This water must be purified (filter or tablets)
- Do not rely on it as your primary water source
Dehydration is one of the main reasons people mentally and physically collapse on Daubenhorn.
8.7 Food strategy (what actually works when exposed)
You need calories you can eat while clipped in.
Works well
- Gummies / chews
- Soft bars
- Salty snacks
- Small, frequent bites
Works badly
- Hard, dry bars
- “Big lunch at the top” plans
- Food that requires long stops
Once exposed, appetite drops fast. Plan food you can eat even when you don’t want to.
8.8 Renting vs bringing your own gear
What you should bring yourself
- Shoes
- Clothing layers
- Backpack
- Food & water
- Gloves (fit matters)
What is okay to rent
- Helmet
- Harness
- Via ferrata set
- Rest system (confirm it’s included)
Where to rent
- Gemmi cable car mountain station
- Full via ferrata kit available
- Approx. CHF 30/day
- Outdoor shops in Switzerland (pre-trip)
- Useful if you want everything sorted beforehand
If you rent:
- Check carabiner gates
- Check energy absorber condition
- Confirm rest system is included
8.9 Small but important extras
- Sunglasses + sunscreen
- Headlamp (queues or delays happen)
- Phone with offline GPS track
- Minimal first-aid (blister care, tape, painkillers)
9. Route Breakdown – Stage by Stage (Topo, Timing & Descent)
The Daubenhorn is not one continuous climb. It is a long, structured alpine route with clearly defined phases — and one critical decision point where you must choose whether to continue or exit. Understanding how the route is built, what each stage should feel like, and what the topo is actually telling you is essential for pacing, safety, and good decision-making.
9.1 Understanding the Topo (Before You Start)
Most official topos divide the Daubenhorn into:
- an approach
- three via ferrata stages
- one bailout
- a long alpine descent
On German-language maps and topos, the bailout is marked with:
Abstieg — German for descent / exit
This is easy to underestimate if you don’t speak German.
It does not mean an easy walk down. It means:
This is your last clean exit before the route becomes fully committed.
Once you pass the bailout, retreat becomes impossible and more dangerous than continuing.
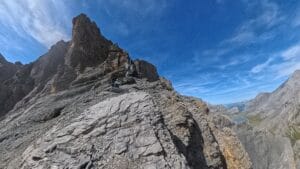
9.2 Approach to the Route (Stage 0)

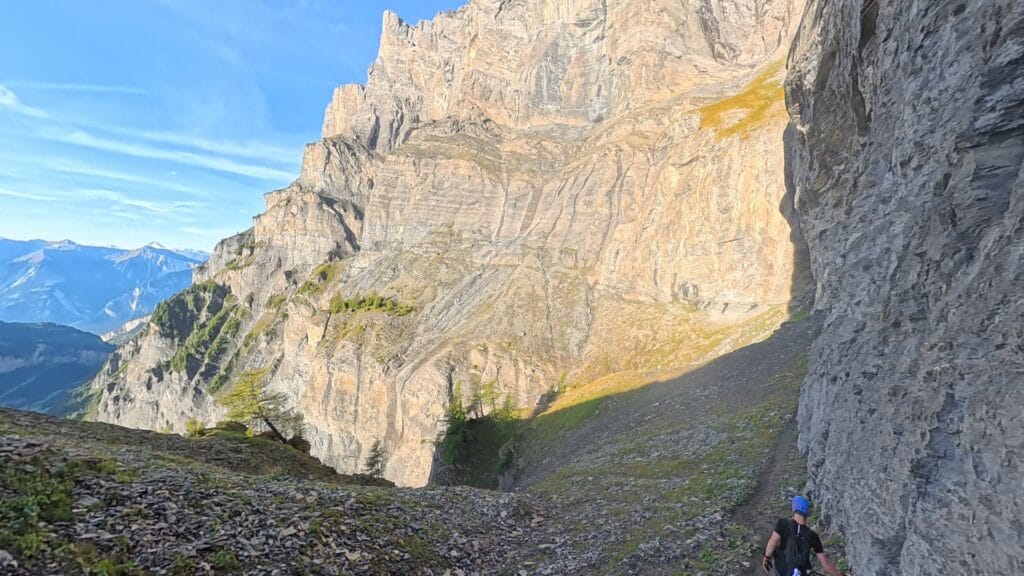
Time: ~45–60 minutes
Elevation gain: ~250–300 m
The approach from Gemmi begins gently:
- Clear hiking trail
- Scenic terrain
- Easy walking
But don’t mentally switch off.
Important details
- Narrow paths with serious drops
- Wet rock sections from snowmelt
- One slippery slab crossing that looks harmless but isn’t
This is not the hardest part of the day — but a slip here already has consequences. Move deliberately and conserve mental energy.
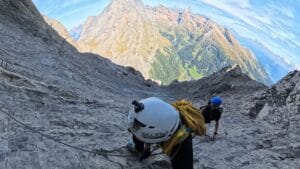
9.3 Stage 1 – Entry Section & First Ladders (Reality Check)
Time: ~60–90 minutes
Elevation gain: ~300–350 m
This stage introduces:
- Steeper rock
- Increasing exposure
- The first long vertical ladder systems
What this stage should feel like
- Clearly physical
- Elevated heart rate
- Arms working, but recovering well during rests
If this stage already feels:
- Chaotic
- Panicky
- Arm-destroying
👉 You are being warned.
9.4 Bailout Decision – “Abstieg” (Most Important Point of the Day)
At the end of Stage 1, the topo clearly marks Abstieg. Rule to follow:
If you even slightly struggle during Stage 1, take the bailout.
Not because you’re weak — but because:
- Stage 2 is longer
- Stage 2 is steeper
- Stage 2 is far more physical
- Waiting and queues get worse, not better
About the bailout itself
- Time: ~1.5–2.5 hours down
- Steep, exposed hiking
- Slippery and dangerous when wet
- Not recommended in rain
The bailout is still serious alpine terrain — but it is far safer than pushing on while depleted. Most accidents on Daubenhorn happen because people ignore this point.
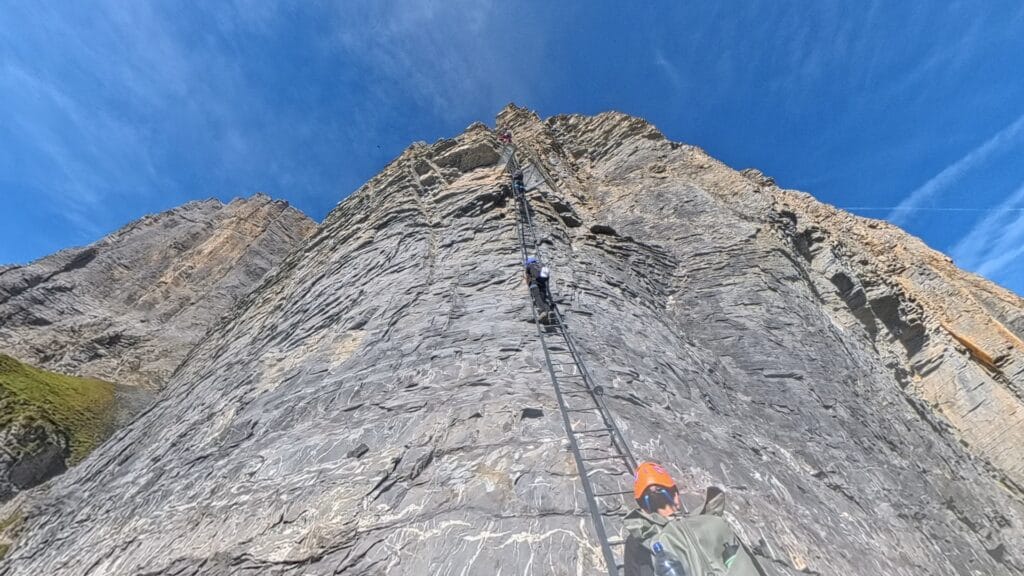
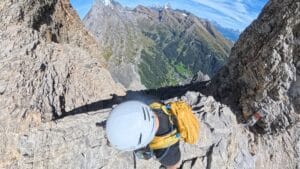
9.5 Stage 2 – Core Section (Endless Vertical)
Time: ~2.5–4 hours
Elevation gain: ~500–600 m
This is the heart of the Daubenhorn — and where most people break.
Terrain
- Long ladder stacks
- Sustained vertical walls
- Traverses with minimal footholds
- Massive exposure
- Frequent waiting in queues
Waiting here means:
- Hanging in your harness
- Standing on ladder rungs
- Burning forearms without moving
This is why a rest system is mandatory.
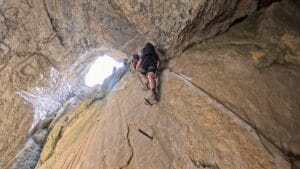
The bridge
One of the most iconic features:
- Tightrope-style bridge
- Hundreds of meters of air below
Not technically difficult, but:
- Wind increases instability
- Multiple people make it wobble
- This is a major chokepoint, meaning the queue just before will be bad
Cross it alone if possible.
9.6 The Cave & E-Graded Variants
Inside the cave, the topo shows:
- Two options
- One harder E / K6 line
- One easier bypass
Why this section is hard
- Overhanging moves
- Continuous unclipping and re-clipping
- Limited footholds
- Upper-body strength under fatigue
This is where:
- Poor fueling
- No rest system
- Bad pacing
become serious problems.
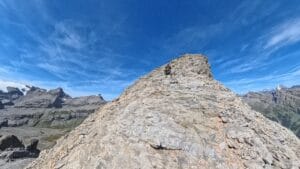
9.7 Stage 3 – Upper Exit (Easy on Paper, Brutal in Reality)
Time: ~45–75 minutes
Elevation gain: ~200–250 m
Technically, this is the easiest part of the ferrata. Physically, it often feels like the hardest.
By this point:
- You’ve already climbed for hours
- Arms are deeply fatigued
- Legs feel heavy
- Mental focus is fading
Terrain
- Easier scrambling
- Light ferrata sections
- Still exposed and consequential
And then comes the part many people underestimate.
The final ladder (critical section)
The final ladder is extremely long — much longer than it looks from below.
Key characteristics:
- Sustained climbing with few natural rest positions
- Appears very late in the day, when fatigue is highest
- Angled slightly back, not perfectly vertical
How to handle it
- Make sure you are fully rested before starting
- Eat and drink before committing
- Use your rest system intentionally
- Take breaks — this is not the place to rush
9.8 Optional Summit Detour
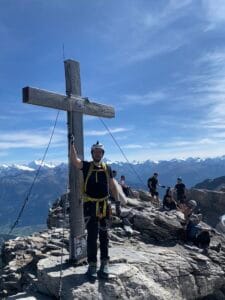
Extra time: ~20–30 minutes
You can make a short detour to stand on the true summit of the Daubenhorn. Do this only if:
- Weather is stable
- You are not racing daylight or the cable car
- You still feel mentally sharp
The summit is optional. A safe descent is not.
9.9 Descent – Long, Alpine & Easy to Misjudge
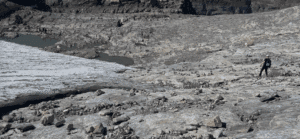
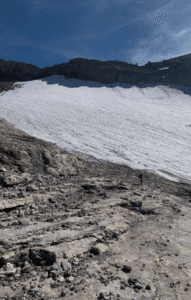
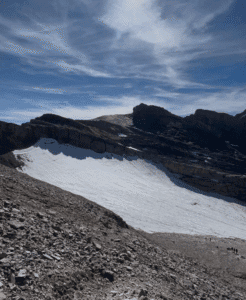
Time: ~2–3 hours. The descent is not a casual walk-off.
What happens
- Steep initial terrain
- Route-finding becomes unclear
- You descend near glacier runoff
- Then must traverse left and slightly upward again
Markers exist, but:
- They are easy to miss
- Snow can obscure the trail
👉 Strongly recommended: use a GPS track. (Download below)
Early season conditions
- Snow may remain on the descent
- Trail may disappear completely
- Crampons may be required
Slips here would be very serious. Once past this section:
- Navigation becomes easier
- But the trail is long and indirect
This is where people underestimate timing and risk missing the last cable car.
9.10 Water on Route & Descent
- No reliable water refill points on the ferrata
- Glacier runoff may be available on the descent
- This water must be purified
Do not rely on it as your primary water source.
9.11 Timing Summary
| Section | Typical Time |
|---|---|
| Approach | 45–60 min |
| Stage 1 | 60–90 min |
| Stage 2 | 2.5–4 h |
| Stage 3 | 45–75 min |
| Descent | 2–3 h |
Total realistic time
- Uncrowded: ~5–7 h
- Normal: 7–8 h
- Crowded: 8–10+ h
If you are behind schedule before or at the bailout, that is a strong signal to bail.
10. Safety, Rescue & Insurance (What Actually Matters on Daubenhorn)
The Daubenhorn is equipped with steel cable, ladders, and anchors — but it is not a controlled environment. Most accidents here don’t happen because people fall. They happen because of fatigue, poor decisions, crowding, and timing. This section focuses on real risks, how rescue actually works, and why insurance is not optional.
10.1 The real risks on Daubenhorn (not the obvious ones)
1. Fatigue-related mistakes
The biggest danger on Daubenhorn is long-duration fatigue. After 5–7 hours:
- Grip strength drops
- Clip technique gets sloppy
- Foot placement becomes lazy
- Decision-making degrades
This is why:
- The bailout exists
- The final ladder causes problems
- People get injured late, not early
Fatigue turns small mistakes into serious incidents.
2. Crowding & “domino” risk
On busy days, climbers are often too close together. This increases risk of:
- One person falling onto another
- Dropped rocks or gear
- Being forced to hang while waiting
Most via ferrata injuries do not come from solo falls — they come from someone else falling into you. This is another reason why:
- Weekdays matter
- Starting early matters
- Rest systems matter
3. Rockfall
Rockfall risk increases when:
- Many people are on the route
- People climb above each other
- Fatigue leads to sloppy footwork
A helmet is mandatory — but spacing and patience matter more.
4. Weather escalation
Daubenhorn is:
- Long
- Exposed
- High
This means:
- Thunderstorms are extremely dangerous
- Rain turns the bailout and descent into hazards
- Wind amplifies fear and fatigue on ladders and the bridge
Once you are past the Bailout, you are committed for hours.
5. Descent accidents
Many incidents happen after the ferrata:
- Poor route-finding
- Snow-covered trail
- Rushing to catch the last cable car
- Slips on tired legs
The descent is not a formality — it’s part of the route.
10.2 What to do in an emergency
Swiss emergency number
- 144 – Swiss emergency services
- You can also call 112 (EU-wide)
In mountain emergencies, you may be connected to air rescue (Rega).
If someone is injured on the route
- Secure yourself first
- Prevent further falls
- Communicate clearly
- Conserve battery on your phone
Rescue on Daubenhorn is:
- Complex
- Time-consuming
- Often done by helicopter
This is not a “quick pickup”.
10.3 Helicopter rescue in Switzerland (reality check)
Mountain rescue in Switzerland is world-class — but not free. A helicopter rescue can cost:
- CHF 3,000 – 10,000+
- More if technical extraction is required
- More if weather complicates the operation
Without proper insurance, you pay this yourself.
10.4 Why normal travel insurance is often NOT enough
Many standard travel insurance policies:
- Exclude “mountaineering”
- Exclude via ferrata above a certain grade
- Limit helicopter rescue costs
- Only cover guided activities
Daubenhorn (K5–K6 / ED) often falls outside basic coverage. You must explicitly check:
- Via ferrata coverage
- Helicopter rescue
- Un-guided alpine activities
- Altitude limits
If it’s unclear, assume you are not covered.
10.5 Strongly recommended insurance options
Local Alpine club membership (best value)
Joining your local alpine club is one of the simplest and cheapest ways to be properly insured.
Highly recommended.
- Austrian Alpine Club (ÖAV) can even be joined by non european residents
Typical benefits:
- Worldwide mountain rescue coverage
- Helicopter rescue included
- Covers via ferrata and alpine routes
- Often includes repatriation
Cost: €80–120 per year
Read the fine print carefully.
10.6 Guided vs unguided from a safety perspective
Guided
Pros:
- Professional decision-making
- Group management in crowds
- Route familiarity
- Reduced mental load
Cons:
- Expensive
- Fixed pace
- Less flexibility
Guided makes sense if:
- This is near your limit
- You lack long ferrata experience
- Conditions are marginal
Unguided
Pros:
- Full flexibility
- Faster if experienced
- Better pacing for strong parties
Cons:
- All decisions are on you
- No external safety net
- You must self-assess honestly
Unguided only makes sense if:
- You meet the experience requirements
- You respect the bailout
- You are properly insured
10.7 The most important safety rule on Daubenhorn
Good decisions early prevent emergencies later.
That means:
- Start on the right day
- Respect the bailout
- Eat and drink consistently
- Use your rest system
- Don’t let ego overrule warning signs
Rescue is a last resort — not a plan.
Before You Go: Download the Daubenhorn Checklist & GPX (Free)
The Daubenhorn is not a route you “figure out on the go”. Once you pass the bailout, your options narrow fast — and decisions made under fatigue are rarely good ones. That’s why I put together a free Daubenhorn preparation bundle, based on this climb and the mistakes I’ve seen (and made) myself.
What you’ll get
- ✅ Packing checklist
Including mandatory ferrata gear, rest system, layers, food and 2.5–3 L water minimum - ✅ GPX track and printable map
For the approach, descent and optional summit detour — especially useful when the trail becomes hard to follow
This is the checklist I would want in my pack, not just in my head.
Get the free Daubenhorn Checklist & GPX
💌 Enter your email below and I’ll send the free checklist straight to your inbox.
(No spam/unsubscribe any time)