Table of contents
- Quick Facts
- Intro
- Is Mount Toubkal the Best First 4,000m Mountain?
- What Itinerary Should You Choose? (2 vs 3 vs 4 Days)
- The Route Explained: What to Expect (Winter vs Summer)
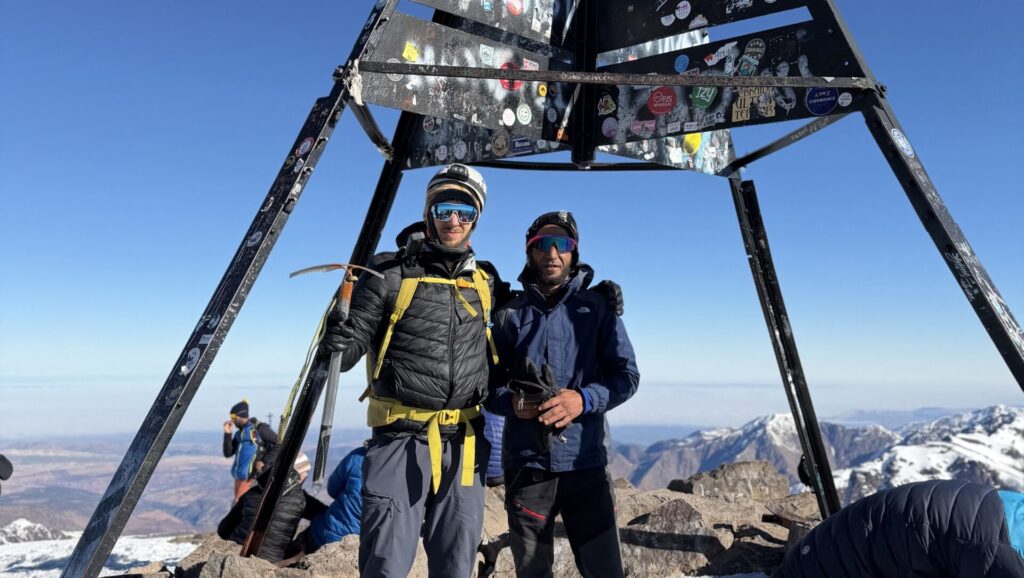
- Summit Day: Refuge → Summit (4,167m)
- The Descent: The Real Test
- Summer vs Winter: The Real Difference
- Refuge Reality: Where You Stay & What It’s Actually Like
- Logistics: How to Get There & What to Arrange
- Full Gear Guide: What to Bring (Summer vs Winter)
- Training Plan & How Fit You Need to Be
- Travel & Mountain Insurance (Non-Negotiable)
- Full Budget Breakdown: What Does Mount Toubkal Really Cost?
- Guide & Package Cost Comparison
- Final Summary: Who Mount Toubkal Is (And Isn’t) For
- Get the Complete Toubkal Packing Checklist (Free)
Quick Facts
Before diving into the details, here’s a quick overview of what you’re actually signing up for:
- Elevation: 4,167 meters (13,671 ft)
- Location: Atlas Mountains, Morocco
- Nearest Airport: Marrakech (RAK)
- Starting Point: Imlil (1,740m)
- Refuge Altitude: ~3,207m
- Typical Duration: 2–4 days
- Total Vertical Gain: ~2,400m from Imlil
- Day 1 Ascent: ~1,450m
- Summit Day Ascent: ~960m
- Summit Day Descent: ~2,400m (if returning to Imlil same day)
- Technical Climbing Required? No
- Glaciers or Crevasses? No
- Guide Mandatory? Yes
- Best Season (Summer Conditions): May–October
- Winter Season (Snow Likely): December–March
- Winter Gear Needed: Crampons, ice axe, B2 boots
- Mule Support Available: Yes (summer only)
- Estimated Total Budget: €350–600 (excluding flights)
- Difficulty: Physically demanding, non-technical
Toubkal isn’t a technical climb — but the altitude, long summit day, and massive descent make it a serious mountain.
Intro
Mount Toubkal (4,167m) is often described as “just a hike.” Technically, in summer, that’s true. There’s no glacier. No rope team. No technical climbing. But that description leaves out something important.
At over 4,000 meters, Toubkal is high enough to test your fitness, your pacing, and your ability to handle altitude. Add winter conditions, early alpine starts, snow-covered slopes, and a brutally long descent — and this mountain becomes a serious objective.
I climbed Toubkal on the classic 2-day itinerary in winter, and while I made the summit, I also made mistakes. I underestimated the descent. I rushed acclimatization. I learned quickly that “non-technical” does not mean “easy.”
This guide covers everything I wish I knew beforehand — logistics, costs, transport, SIM cards, ATM fees, refuge reality, gear choices, pacing strategy, winter vs summer differences, and why Toubkal might just be the perfect first 4,000m peak.
If you’re considering climbing Mount Toubkal, this is the real version — not the Instagram one.
Is Mount Toubkal the Best First 4,000m Mountain?
If your long-term goal is climbing 4,000-meter peaks in the Alps — Mont Blanc, Gran Paradiso, Breithorn, Allalinhorn — then Mount Toubkal might be the smartest place to start.
Not because it’s easy.
But because it gives you real alpine exposure without the full technical complexity (and financial risk) of Alpine 4,000ers.
Let’s break that down.
A Guide Is Mandatory — And That’s a Good Thing
Climbing Toubkal requires a certified local guide.
At first, that might feel restrictive.
In reality, it makes it the perfect first 4,000m experience.
You get:
- Professional pacing
- Local route knowledge
- Weather judgment
- Safety backup if altitude hits
- Refuge logistics handled
For a first high-altitude experience, this removes a massive layer of stress. When you climb your first Alpine 4,000m peak, you’ll almost certainly hire a guide anyway. Toubkal gives you that guided alpine structure — but in a more controlled environment.
No Glaciers, No Crevasses, No Rope Teams
This is the key difference compared to the Alps.
On most classic Alpine 4,000ers, you deal with:
- Crevasses
- Glacier rope systems
- Snow bridges
- Technical ridges
- Exposure with real consequences
On Toubkal, you don’t.
There are no glaciers.
No crevasse danger.
No need to rope up.
You can focus purely on:
- Your fitness
- Your pacing
- Your layering system
- Your reaction to altitude
It’s alpine — but simplified.
That makes it the perfect stepping stone.
The Cost Is a Fraction of the Alps
A guided 4,000m climb in the Alps can easily cost:
- €700–1,500+ per person
- Hut fees
- Lift passes
- Equipment rental
- Guide day rates
Mount Toubkal:
- €150–250 for a group 2-day package
- €300–600 for a private 2-person tour
You can test whether you actually enjoy:
- Alpine discomfort
- Early summit starts
- Long summit days
- Moving at altitude
Without spending Alpine-level money.
That alone makes it one of the best entry points into high-altitude mountaineering.
Winter Toubkal = Real Alpine Training
In winter, Toubkal becomes even more valuable.
You’ll experience:
- Walking in crampons
- Using an ice axe
- Wearing B2 boots
- A 4:00 AM alpine start
- Moving uphill in the dark with a headlamp
- Cold summit winds
- Long days with serious vertical gain
Day 1:
~1,450m ascent to the refuge.
Summit day:
~960m up
~2,400m down
Often 8–11 hours of movement.
That’s real alpine effort.
What I Personally Learned
This is where Toubkal became truly valuable for me.
The downhill absolutely cooked my legs.
The 2,400m descent after summiting — especially after starting before dawn — hit much harder than I expected. By the time we were nearing Imlil, my legs were completely done.
That lesson alone was worth the trip.
Because on bigger Alpine objectives, the descent can be even more dangerous than the ascent. Toubkal showed me exactly where my endurance limits were.
I also discovered something else:
I don’t acclimatize very fast.
I experienced mild symptoms of altitude sickness — slight headache, reduced appetite, subtle fatigue. Nothing that prevented me from summiting. But enough to notice.
And that’s crucial information.
Finding that out on Toubkal — in a controlled, guided, non-glaciated environment — is far better than discovering it for the first time on Mont Blanc.
Toubkal became a testing ground.
Not just physically, but physiologically.
It Teaches the Most Important Lesson: The Summit Is Halfway
Many first-time 4,000m climbers think the summit is the hardest part.
It’s not.
The descent is.
Toubkal forces you to respect that.
And it teaches you pacing discipline, humility, and endurance management — lessons that transfer directly to bigger mountains.
So… Is It the Best First 4,000m Peak?
If you want:
- Real altitude
- Winter alpine exposure
- Crampon experience
- Guided structure
- No glacier danger
- Lower financial risk
- A safe environment to test how your body handles 4,000m
Then yes — Mount Toubkal is arguably one of the best first 4,000m mountains in the world.
But only if you respect it.
Because “non-technical” does not mean “easy.”
What Itinerary Should You Choose? (2 vs 3 vs 4 Days)
Most people book the classic 2-day itinerary.
And yes — it’s doable.
But “doable” and “optimal” are not the same thing.
Your itinerary determines:
- How well you acclimatize
- How strong you feel on summit day
- How destroyed your legs feel on the descent
- And how much you actually enjoy the experience
Let’s break it down properly.
The 2-Day Itinerary (Fast & Common)
Day 1:
Imlil (1,740m) → Refuge (3,207m)
~10–11 km
~1,450m ascent
4–6 hours
Day 2:
Refuge → Summit (4,167m) → Imlil
~18–20 km total
~960m ascent
~2,400m descent
8–11 hours
This is the standard package most agencies sell.
It works if:
- You acclimatize easily
- You are very fit
- You don’t mind a very long summit day
But here’s the reality.
Gaining almost 1,500 vertical meters on Day 1 is significant.
I personally felt it.
I had mild altitude symptoms — slight headache, reduced appetite, subtle fatigue. Nothing that prevented me from summiting, but enough to realize I don’t acclimatize very fast.
And the 2,400m descent after summiting absolutely cooked my legs.
By the time we reached Imlil, my legs were done.
If I could redo it, I wouldn’t choose 2 days again.
The 3-Day Itinerary (The Smarter Balance)
If you want a more controlled and enjoyable experience, 3 days is the sweet spot.
Option 1 – Split the Descent
Day 1: Imlil → Refuge
Day 2: Summit → Return to Refuge
Day 3: Refuge → Imlil
This splits summit effort and descent into two separate days.
Benefits:
- Less physical destruction
- Lower fatigue on technical snowy sections
- More recovery margin
- Safer pacing
Option 2 – Acclimatization Peak From the Refuge
This is the version I would choose next time.
Day 1: Imlil → Refuge
Day 2: Acclimatization hike to a lower peak → Return to Refuge
Day 3: Summit → Imlil (or Refuge → Imlil if splitting descent)
From the refuge (3,207m), you can hike to nearby lower summits or high points around 3,600–3,900m depending on conditions.
You:
- Gain altitude
- Stimulate adaptation
- Sleep again at 3,200m
- Approach summit day more adapted
This “climb high, sleep same height” strategy gives your body time to adjust before pushing to 4,167m.
For someone like me — who clearly doesn’t acclimatize extremely fast — this is a major advantage.
The 4-Day Itinerary (Most Controlled & Strategic)
If you want the most structured experience — especially in winter — 4 days is ideal.
Example Structure:
Day 1: Arrival + light acclimatization hike from Imlil
Day 2: Imlil → Refuge
Day 3: Acclimatization peak from Refuge → Return to Refuge
Day 4: Summit → Refuge or Imlil
This gives you:
- Progressive altitude exposure
- Better summit-day performance
- Lower fatigue
- Higher success probability
If you’re using Toubkal as preparation for bigger alpine objectives, this is the smartest approach.
DIY Acclimatization (Save Money & Improve Your Odds)
You don’t need to pay for an extended guided package to improve acclimatization.
Arrive in Imlil at least one full day before your guided program starts.
On that day, hike independently toward the police checkpoint.
The police checkpoint sits at roughly ~2,000 meters altitude.
From Imlil (1,740m), this gives you:
- ~250–300m vertical gain
- A chance to test pacing
- Light altitude exposure
- A chance to loosen up your legs
It’s not a massive altitude stimulus — but every bit helps.
You then sleep again at 1,740m.
For me, knowing now that I don’t acclimatize particularly fast, this extra day would be non-negotiable in the future.
So What Should You Choose?
Choose 2 days if:
- You’re short on time
- You acclimatize well
- You accept a very long summit day
Choose 3 days if:
- You want better pacing
- You want less leg destruction
- You want smarter altitude strategy
Choose 4 days if:
- You know altitude affects you
- You’re training for bigger alpine goals
- You want maximum margin and control
If your goal is to “tick a summit,” 2 days works. If your goal is to build mountaineering experience and understand how your body performs above 4,000m, 3–4 days is significantly smarter.
The Route Explained: What to Expect (Winter vs Summer)
Mount Toubkal follows a straightforward route — but conditions change everything.
The climb is typically done in two main stages:
- Imlil (1,740m) → Toubkal Refuge (3,207m)
- Refuge → Summit (4,167m) → Return
The terrain itself is not technical.
But altitude, surface conditions, pack weight, and weather determine how serious it feels.
Let’s break it down.
Day 1: Imlil → Refuge (3,207m)
Distance: ~10–11 km
Elevation gain: ~1,450m
Time: 4–6 hours
The trail begins in Imlil and gradually climbs through:
- Dirt paths past Berber homes
- Rocky mule tracks
- Wide valley sections
- Gradually steeper mountain terrain
You pass Sidi Chamharouch (a small pilgrimage site) roughly halfway.
From there, the terrain becomes more alpine and the gradient increases steadily toward the refuge.
The final stretch is a consistent uphill grind.
Summer Trail Conditions
In summer (late spring to early autumn):
- Dry dirt trails
- Loose rock sections
- Occasional scree
- Hot lower valley temperatures
- Dusty terrain
Technically straightforward.
No snow.
No ice.
No glacier hazards.
Main challenges:
- Heat
- Dehydration
- Altitude gain
- Loose footing on descent
Trail shoes or light hiking boots are typically sufficient.
Major Advantage in Summer: Mule Support
In summer, you can hire a mule to carry your overnight gear to the refuge.
This is a huge energy saver.
You can hike with a light daypack, making the 1,450m ascent far more manageable.
Winter Trail Conditions
Winter changes the mountain completely.
From roughly halfway up the valley (depending on snow levels), the trail can be:
- Snow-covered
- Icy in shaded sections
- Slippery on steeper slopes
- Wind-exposed
The approach to the refuge is often:
- Snowy in upper sections
- Hard-packed in the morning
- Slushy in the afternoon
You may not need crampons immediately, but conditions vary daily.
Winter Means More Weight on Your Back
This is one of the biggest differences people underestimate.
In winter, you’ll likely carry:
- B2 mountaineering boots
- Crampons
- Ice axe
- Helmet
- Heavier gloves
- Extra insulating layers
That adds significant weight. And unlike summer:
👉 Mules are generally not available once the trail is snow-covered.
You carry everything yourself.
I wore my B2 boots for the entire approach. That was a mistake. Heavy boots plus winter gear made the ascent noticeably more exhausting.
If I were to do it again, I would:
- Approach in lighter shoes (if conditions allow)
- Switch to B2 boots at the refuge
- Minimize unnecessary weight
Winter Toubkal is physically more demanding not because the route is technical — but because you’re carrying more and moving in snow.
Summit Day: Refuge → Summit (4,167m)
Elevation gain: ~960m
Start time: 4:30–5:00 AM
Total movement time: 6–8 hours (to summit and back to refuge)
You leave in the dark with headlamps on.
The first half is a steady, sustained uphill grind. No scrambling. No climbing moves. Just incline.
Summer Summit Conditions
- Rocky trail
- Loose scree in sections
- Clear path
- No snow
Physically demanding.
Technically simple.
Main challenges:
- Altitude
- Pacing
- Wind exposure near summit
Winter Summit Conditions
In winter, summit day feels properly alpine.
Expect:
- Snow-covered slopes
- Crampons required
- Ice axe carried
- Firm early-morning snow
- Cold summit winds
- Slower pace due to snow resistance
The slope below the summit can feel steep if you’re new to crampons. This is where Toubkal becomes excellent training.
You learn:
- Efficient crampon walking
- Breathing control at 4,000m
- Layer management in cold conditions
- Moving uphill in darkness
It’s not technical mountaineering. But it feels like a real alpine environment.
The Descent: The Real Test
From summit to Imlil in one push: ~2,400m of descent.
In winter:
- Snow can be slippery
- Legs fatigue faster due to heavier boots
- Pack weight makes balance harder
- Concentration drops after a long day
This is where my legs were completely cooked.
After starting before sunrise and spending hours moving uphill in snow, the downhill felt endless.
Trekking poles are not optional here.
They are a cheat code.
The summit is halfway.
The descent is where endurance, focus, and preparation are tested.
Summer vs Winter: The Real Difference
Summer
- Technically straightforward
- Lighter pack
- Mule support available
- Trail shoes fine
- Main challenge = heat & altitude
Winter
- Heavier pack (boots, crampons, axe, helmet)
- No mule support
- Snow & ice conditions
- Early alpine start
- More energy expenditure
- Feels significantly more alpine
Winter doesn’t make Toubkal technical.
But it makes it serious.
And that’s exactly why it’s such a powerful first 4,000m experience.
Refuge Reality: Where You Stay & What It’s Actually Like
Most people don’t realize this:
There isn’t just one refuge on Mount Toubkal.
There are multiple refuges located next to each other at around 3,207 meters.
Which one you stay in depends entirely on the guide company you book with.
You usually don’t choose the refuge yourself — your guide company handles the booking.
The Main Refuges
At the base of Toubkal you’ll typically find:
- Refuge du Toubkal (Neltner Refuge) – the larger, more established hut
- Les Mouflons Refuge – privately run, slightly smaller
- Smaller annex buildings or overflow dorms
They are located very close to each other, essentially forming a small mountain village. Functionally, they are quite similar. None of them resemble modern Alpine huts in Switzerland or Austria. Expect basic mountain shelter — not comfort.
What Sleeping There Is Like
This is where expectations need adjustment.
Dorm rooms are:
- Large shared spaces
- Giant bunk bed structures
- Often triple-stacked beds
- Mattresses close together
In some setups, there is:
- Only one ladder serving three stacked beds
- Very tight spacing
If you’re on the top bunk and need to get down at night, you may need to carefully squeeze past someone. I personally had to get up three times during the night. It’s not comfortable.
Noise Level
Quiet hours are not strictly enforced.
People often:
- Pack bags late
- Wake up early
- Talk in the dorm
Bring:
- Earplugs (essential)
- Sleeping mask (strongly recommended)
- Sleeping bag liner (very important for hygiene)
Blankets are provided, but they are not washed frequently. A liner is not mandatory — which honestly surprised me — but you absolutely should bring one.
Hygiene & Bathrooms
This is not an Alpine-standard hut.
Bathrooms:
- Basic toilets
- Visible mold in some areas
- Black mold in shower spaces
- Limited ventilation
Showers exist in some refuges, but:
- Water can be cold
- Pressure inconsistent
- Cleanliness varies
It’s functional, not luxurious. Go in with the right expectations and you’ll be fine.
Food at the Refuge
One pleasant surprise: Food portions are generous.
Typical dinner includes:
- Soup
- Bread
- Tagine (vegetable or meat)
- Sometimes pasta or rice dishes
- Tea
Breakfast (before summit push, often around 4:00 AM):
- Bread
- Jam
- Butter
- Coffee or tea
It’s simple but filling. If you struggle eating at altitude (like I do), bring your own snacks just in case and drink tea with a lot of sugar.
Camping Option (Summer Only)
In summer, you can also camp near the refuge.
This gives you:
- More privacy
- Potentially better sleep
- Slightly more personal space
However:
- You still use refuge facilities
- You still eat in the hut (if included)
- You carry your own camping gear unless using mule support
Camping is usually not an option in winter due to snow and cold.
WiFi & Mobile Coverage
There is WiFi at the refuge.
But:
- It is extremely slow
- Good enough for WhatsApp text
- Not good for photos or uploads
Mobile coverage depends on your provider.
With a Moroccan SIM:
- You may get limited signal
- Coverage can be unstable
- Expect weak connection
Do not rely on connectivity for safety planning.
Download maps offline before arriving.
The Atmosphere
Despite the basic conditions, there is something special about the refuge atmosphere.
You’ll meet:
- First-time 4,000m climbers
- People training for bigger peaks in the Alps
- Local guides who climb the mountain multiple times per week
- Travelers from all over the world
What to Expect (Summary)
You get:
- Basic dorm accommodation
- Generous simple meals
- Functional but worn facilities
- Limited WiFi
- Real mountain atmosphere
You don’t get:
- Privacy
- Silence
- Modern hygiene standards
- Hotel comfort
If you arrive expecting luxury, you’ll be disappointed. If you arrive expecting a functional high-altitude mountain shelter, you’ll be fine.
Logistics: How to Get There & What to Arrange
Climbing Toubkal itself is straightforward.
Getting the logistics right is where most friction happens.
If you plan this well, the entire trip feels smooth.
If you don’t, you’ll deal with unnecessary stress before even starting the hike.
Here’s how to do it properly.
Flying to Marrakech (RAK)
Most international climbers fly into Marrakech Menara Airport (RAK). The good news: Many low-budget airlines fly into Marrakech from across Europe, including:
- Ryanair
- EasyJet
- Transavia
- Wizz Air
- Vueling
This makes Toubkal one of the most accessible 4,000m peaks in the world from a European perspective.Flights are often inexpensive compared to Alpine destinations. From the airport, Imlil is:
- ~65 km
- ~1.5 hours by car
If you land late afternoon or evening (like I did), you can either:
- Stay one night in Marrakech
- Or go directly to Imlil
I personally went straight to Imlil. Accommodation there is cheaper and more relaxed than Marrakech.
Money: ATM Fees & Cash Strategy
Cash is king in the Atlas Mountains.
Most ATMs in Morocco charge withdrawal fees:
- €3–6 per withdrawal
- In Imlil: closer to €6
- There is basically only one ATM in Imlil
👉 Best strategy: withdraw enough cash at the airport. (ATM can be found on the right side just after exiting the baggage area)
Euros are widely accepted, but Dirham is easier for:
- Water
- Snacks
- Small purchases
- Tips
You will likely pay slightly inflated tourist prices in many situations. Not necessarily a scam — just reality. Unless a price is clearly listed, negotiation is normal.
SIM Cards & Connectivity
There are three main providers at Marrakech airport:
- Maroc Telecom
- Orange
- inwi
All have kiosks inside the arrivals hall.
What to do:
- Ask all three for their offers
- Compare data packages
- Choose the cheapest one
For me, Orange had the best offer at the time. Official website prices are often around €12. At the airport, expect to pay closer to €20 (cash only). This seems to be a standard tourist premium.
The advantage:
- They activate it for you
- It works immediately
- No hassle in the city
- They usually stay open until the last flight arrives
Marrakech → Imlil Transport Options
You have three realistic choices.
Private Taxi (Most Convenient)
Cost:
- €20–50
- Depends on negotiation skills and time of day
Earlier in the day = cheaper.
Drivers are more flexible if they can find a return fare.
This is the easiest option.
You will probably overpay slightly — but it’s stress-free.
Collective Taxi (Cheapest Option)
Cost:
- €4–9 per person
How it works:
- Go to the collective taxi station
- Clearly state you want to go to Imlil
- Wait until all seats are filled
- Then depart
Later in the evening, these become harder to find. Best for budget travelers arriving earlier in the day.
Transfer Included in Guide Package
Most guide companies offer transport as part of the package.
Pros:
- No negotiation
- No waiting
- Smooth process
Cons:
- Slightly more expensive
You can sometimes negotiate a discount if you arrange transport yourself.
Where to Stay in Imlil
Accommodation in Imlil is:
- Cheaper than Marrakech
- Better value
- Often includes breakfast
Staying in Imlil makes the start of your climb relaxed and organized.
Booking & Paying Your Guide
Since hiring a guide is mandatory for Mount Toubkal, choosing the right one is one of the most important decisions you’ll make.
The good news?
It’s relatively easy to arrange — and you have several options depending on how much control, flexibility, and negotiation you want.
Option 1: Book Directly with a Local Guide Company (Best Value)
This is usually the most cost-effective and flexible approach. Here’s exactly how to do it:
- Open Google Maps
- Search: “Toubkal guide Imlil”
- Or search: “Toubkal guide Marrakech”
- Filter for companies with:
- Strong reviews
- Recent activity
- Clear contact details
Most communication happens via WhatsApp. Message multiple companies and ask:
- Availability for your dates
- 2-day vs 3-day pricing
- Private vs group options
- What is included (refuge, meals, transport, equipment)
- Payment structure
You’ll quickly notice price differences. Then choose the company that:
- Communicates clearly
- Answers questions directly
- Has consistent positive reviews
- Offers the structure you want
This method usually gives you the best balance between cost and reliability.
Option 2: Use a Booking Platform (Most Straightforward)
If you prefer zero negotiation and immediate confirmation, platforms like GetYourGuide offer many Toubkal group trips.
Benefits:
- Clear pricing
- Instant booking
- Visible reviews
- Easy card payment
- Defined cancellation policies
Downside:
- Slightly higher cost
- Less flexibility
- Fixed group pace
If you want the simplest possible booking experience, this is the easiest route.
👉 You can browse available Mount Toubkal trips here: Getyourguide – Toubkal (If you book through this link, it helps support this guide at no extra cost to you.)
Private vs Group Guide
If you’re traveling solo, joining a group is usually the cheapest option. However, if you’re 3 or more people, a private guide can often become cheaper per person than joining a public group.
Private Guide Advantages
- You control the pace
- You can adapt timing
- More flexibility for acclimatization
- Better overall summit-day experience
This matters more than people think. My guide was extremely fit and climbs Toubkal multiple times per week. If you’re in a mixed-ability group, pacing can become frustrating. With a private guide, the mountain becomes your experience — not the group’s.
Payment Expectations
Most guide companies expect:
- Cash payment
- Often paid the day before departure
- Sometimes a small deposit online + remainder in cash
Before confirming, clarify:
- Total price
- What is included
- What is not included
- Payment method
- Currency expected
Do not assume card payments are accepted. Bring enough cash.
What Should Be Included in the Price?
Always confirm whether your package includes:
- Certified guide
- Refuge accommodation
- Dinner & breakfast
- Summit day support
- Transport (if agreed)
- Equipment rental (if needed)
Some quotes include everything. Some don’t. Ask clearly.
Quick Strategy to Get the Best Offer
Message 4–6 companies. Tell them:
- Your group size
- Your dates
- Preferred itinerary (2, 3, or 4 days)
- Whether you need winter equipment
- Whether you need transport
Compare responses. The best offer is not always the cheapest — clarity and professionalism matter. Within a few conversations, you’ll find a fair and competitive price.
Booking your guide doesn’t have to be complicated. With 20–30 minutes of research on Google Maps and WhatsApp, you can usually secure a solid, well-priced option.
How Much Cash Should You Bring?
For a 2–3 day trip (excluding flights):
Group package:
€150–250 per person
Private (2 people):
€300–600 total
Additional costs:
- Water (~€2 per bottle)
- Snacks
- Equipment rental (€5–10 per piece)
- Tips
- Taxi (Marrakech to Imlil and back)
Withdraw enough to avoid multiple ATM charges.
Final Logistics Tips
- Compare SIM offers at the airport
- Bring small bills
- Clarify guide payment structure
- Download offline maps
- Confirm what your package includes
- Expect small tourist premiums
Toubkal is logistically simple compared to Alpine peaks. But smooth logistics make the difference between a relaxed start and unnecessary stress. Handle this well — and the mountain becomes the only challenge.
Full Gear Guide: What to Bring (Summer vs Winter)
Mount Toubkal is not technical. But your gear determines whether the climb feels smooth — or unnecessarily exhausting. Winter especially increases pack weight and physical strain. Here’s exactly what you need — with budget, mid-range, and high-end recommendations for each category.
This section contains affiliate links. If you book or purchase through them, I may earn a small commission at no extra cost to you.
Core Clothing System (Year-Round)
Base Layer
You want moisture-wicking and breathable.
Budget
- Decathlon synthetic base layer
Mid-Range
High-End
Mid-Layer (Insulation While Moving)
Fleece or light active insulation.
Budget
- Decathlon fleece
Mid-Range
High-End
Down or Synthetic Jacket (Refuge + Summit Stops)
Essential at 4,000m.
Budget
- Decathlon MT100 down jacket
Mid-Range
High-End
Shell Jacket (Windproof Is Critical)
Wind is often the biggest summit factor.
Budget
- Decathlon waterproof shell
Mid-Range
High-End
Sunglasses (Very Important)
Summer
Minimum: Category 3
Winter
Strongly recommended: Category 4
Snow reflection at altitude is intense.
Budget
- Decathlon Cat 4 glacier glasses
Mid-Range
High-End
Snow blindness is real. Don’t cut corners here.
Footwear
Summer
Trail runners or approach shoes are perfect.
Budget
- Decathlon trail shoes
Mid-Range
High-End
Winter (B2 Boots Required)
You can rent B2 boots for around €10 per piece for 2 days. But I strongly recommend using your own if possible. B2 boots are stiff and prone to causing blisters if they don’t fit perfectly.
Budget
- Decathlon Alpinism boots
Mid-Range
High-End
I wore my B2 boots the entire approach. That added unnecessary fatigue. If snow conditions allow, approach in lighter shoes and switch at the refuge.
Crampons
Required in winter. Rental available in Imlil (~€10). Do no use Microspikes, the ascent and descent to the summit is steep. Microspikes do not give enough grip.
Budget
- Decathlon crampons
Mid-Range
If you already own good crampons, bring them. Rental gear is usually heavier.
Ice Axe
Needed for winter conditions.
Budget
- Decathlon mountaineering axe
Mid-Range
Helmet (Winter)
Rockfall and icy sections make helmets smart in winter.
Budget
- Decathlon climbing helmet
Mid-Range
High-End
Trekking Poles (Highly Recommended)
Massive difference on descent.
Budget
- Decathlon poles
Mid-Range
High-End
Poles are a cheat code on the 2,400m descent.
Backpack
25–35L is sufficient.
Budget
- Decathlon 30L pack
Mid-Range
High-End
Water Strategy
You generally should not carry more than 1.5L at a time. You pass multiple small stores on the approach selling bottled water (~€2). Carrying excess water just adds unnecessary weight. There are also water streams on the approach (I don’t know if this is the case in peak summer, since this is from melting snow), but this requires proper filtration. Since the water is reasonably priced I would recommend just buying from the shops and not bothering.
Power & Sleeping Setup
Power Bank (Very Important)
Refuges have limited power outlets. Sometimes only a few sockets for dozens of people. Bring a fully charged power bank.
Budget
Mid-Range
High-End
Sleeping Essentials
- Sleeping bag liner (essential for hygiene )
- Earplugs
- Sleeping mask
Dorms are noisy. Blankets are provided but rarely washed.
Mules (Summer Only)
In summer, you can hire a mule to carry your overnight gear. If you plan to use one:
👉 Bring an extra duffel bag.
You hike with a light daypack. The mule carries your larger bag. In winter, mule support is usually unavailable.
Rental vs Bring Your Own
You can rent:
- B2 boots
- Crampons
- Ice axe
- Helmet
Cost: ~€10 per piece for 2 days. Rental gear works. But your own gear is usually:
- Lighter
- Better maintained
- More comfortable
- Already broken in
Especially boots — avoid renting if possible.
Training Plan & How Fit You Need to Be
Mount Toubkal is not technical. But it is physically demanding. The real challenge is:
- Sustained uphill
- High altitude
- A long summit day
- And a brutal descent
You don’t need to be an ultra-athlete. But you do need solid endurance. Let’s define that properly.
How Fit Do You Need to Be?
You Should Be Able To:
- Hike 4–6 hours continuously
- Climb 1,000–1,500m vertical in a day
- Recover reasonably well the next day
- Move efficiently on uneven terrain
If you struggle with:
- Long stair sessions
- Sustained uphill
- Quad fatigue on descent
Toubkal will expose that.
My Honest Experience
The uphill was manageable. The altitude was noticeable — I had mild symptoms (slight headache, reduced appetite, fatigue), which told me I don’t acclimatize particularly fast. But what really surprised me was the descent. After summiting and dropping ~2,400m back to Imlil in one day, my legs were completely cooked. That’s where fitness really matters. If you’re planning to do the 2-day itinerary, your legs need to handle:
- ~1,450m up Day 1
- ~960m up Day 2
- ~2,400m down Day 2
That’s a serious workload.
Fitness Benchmarks Before You Go
You’re likely ready if you can:
- Hike 20 km with 1,000m vertical gain
- Do 60–90 minutes of continuous incline treadmill work
- Complete a 2–3 hour mountain hike without being destroyed
- Do heavy step-ups for 20+ minutes
If you’re training for winter, add:
- Hiking in boots
- Weighted backpack sessions
- Stair sessions with load
8–12 Week Training Plan for Toubkal
You don’t need a complex program. You need consistency for rougly 8-12 weeks.
Weekly Structure (Ideal)
2x Cardio Base (Zone 2)
45–75 minutes
Incline walking, stair climber, cycling, or hiking
Goal: build aerobic engine
1x Long Hike Session
Build gradually toward:
- 3–5 hours hiking
- 800–1,200m vertical
This mimics summit day fatigue.
1x Uphill Intervals
Example:
- 6–10 rounds
- 3–4 minutes hard uphill
- 2–3 minutes recovery
This builds strength and efficiency.
2x Strength Sessions (Lower Body Focus)
Focus on:
- Bulgarian split squats
- Step-ups (heavy, controlled)
- Walking lunges
- Romanian deadlifts
- Calf raises (straight + bent knee)
- Core stability
Descent strength matters as much as ascent strength.
Descent Training (Most Overlooked)
Most people train for uphill. Very few train for downhill.
Add:
- Slow eccentric step-downs
- Decline treadmill walking
- Controlled downhill hiking
Your quads will thank you.
Winter-Specific Preparation
Winter Toubkal adds:
- Heavier boots
- Crampons
- Extra pack weight
- Snow resistance
To prepare:
- Train in your boots
- Add 5–8kg to your backpack
- Practice long stair sessions
- Strengthen hips & ankles
The extra weight increases fatigue significantly.
Altitude Preparation
You cannot fully train for altitude at sea level.
But you can:
- Improve aerobic base
- Avoid overexertion
- Add acclimatization days
- Stay hydrated
- Control pace
I learned that I don’t acclimatize extremely fast. That’s valuable information before attempting bigger Alpine objectives. Toubkal becomes a testing ground.
Mental Preparation
Summit day starts around 4:30 AM.
You’ll be:
- Cold
- Slightly sleep-deprived
- Walking uphill in the dark
- Breathing harder than usual
Mental resilience matters.
Be comfortable with:
- Discomfort
- Slow pacing
- Long days
If You Want a Simple Summary
You don’t need elite fitness. But you do need:
- Solid cardio base
- Strong legs
- Good pacing discipline
- Respect for altitude
Toubkal is achievable for most active people. But it punishes underprepared legs. Especially on the way down.
Travel & Mountain Insurance (Non-Negotiable)
You need insurance that explicitly covers:
- Trekking / mountaineering
- Altitudes up to at least 4,200m
- Emergency evacuation
- Search and rescue
- Repatriation
Standard travel insurance often excludes:
- High-altitude trekking
- “Mountaineering” above certain elevations
Read the fine print carefully. Many people assume they’re covered — and they’re not.
A Smart Option: Join an Alpine Club (Highly Recommended)
If you’re European — or even if you’re not — one of the smartest insurance solutions is joining a recognized Alpine club.
For example:
- Austrian Alpine Club (ÖAV)
- German Alpine Club (DAV)
- Other national Alpine associations
Important:
The Austrian Alpine Club can be joined by people of any nationality. You do not need to be Austrian.
This makes it especially attractive if you’re planning:
- Multiple 4,000m peaks
- Alpine hut stays (Most huts give discounts to members)
- A long-term mountaineering progression
- Via ferrata’s
What You Typically Get With Membership
Most Alpine club memberships include:
- Global mountain rescue coverage
- High-altitude trekking coverage
- Search & rescue costs
- Repatriation
- Liability insurance
And usually at a very reasonable annual fee compared to specialized mountaineering insurance.
Always verify:
- Maximum altitude covered
- Whether guided mountaineering is included
- Winter activity inclusion
But for many climbers, this is one of the most cost-effective insurance strategies available.
Why This Matters for Toubkal
Rescue infrastructure in Morocco is not like Switzerland.
There is no guaranteed rapid helicopter extraction system.
Evacuations may involve:
- Local coordination
- Delays
- Manual assistance
If something goes wrong, rescue logistics can become complicated — and expensive. Insurance is not optional. It’s part of responsible mountain planning.
Bottom Line
Before you leave:
✔ Confirm altitude coverage
✔ Confirm mountaineering is included
✔ Confirm evacuation & repatriation
✔ Save emergency contacts offline
And if you plan to climb more peaks in Europe, seriously consider Alpine club membership. It’s often the smartest long-term move you can make.
Full Budget Breakdown: What Does Mount Toubkal Really Cost?
Mount Toubkal is one of the most affordable 4,000m peaks in the world.
But your final cost depends on:
- 2 vs 3 vs 4 days
- Group vs private guide
- Summer vs winter
- Gear rental
- Transport choices
Let’s break it down clearly.
Guide & Package Cost Comparison
| Option | Duration | Price (Per Person) | What’s Included | Who It’s Best For |
|---|---|---|---|---|
| Group Package | 2 Days | €150–250 | Guide, refuge night, dinner, breakfast | Budget, short on time |
| Private (2 people) | 2 Days | €150–300 (per person equivalent) | Same as above, flexible pace | Better pacing & control |
| Group Package | 3 Days | €200–350 | Extra refuge night + meals | Smarter acclimatization |
| Private (2 people) | 3 Days | €250–400 (per person equivalent) | More flexibility | Preparation for bigger peaks |
| 4-Day Program | 4 Days | €350–700+ | Full acclimatization structure | Maximum margin & comfort |
Transport Comparison (Marrakech ↔ Imlil)
| Transport Type | Cost (One Way) | Pros | Cons |
|---|---|---|---|
| Collective Taxi | €4–9 per person | Cheapest | Must wait until full |
| Private Taxi | €20–50 total | Fast & easy | Slightly inflated price |
| Included in Package | Built-in | Hassle-free | Less flexible |
Winter Gear Rental Costs
| Gear Item | Rental Cost (2 Days) | Recommended to Rent? |
|---|---|---|
| B2 Boots | ~€10 | Only if you don’t own (fit is critical) |
| Crampons | ~€10 | Fine to rent |
| Ice Axe | ~€10 | Fine to rent |
| Helmet | ~€10 | Fine to rent |
Total Winter Rental Estimate: €30–40 per person
If you already own quality gear, bring it — it will likely be lighter and better maintained.
Example Total Trip Budgets
Budget Summer 2-Day (Group)
| Expense | Cost |
|---|---|
| Flights | €100–150 |
| Collective Taxi | €10–15 |
| Guide Package | €180 |
| Accommodation (1 night) | €25 |
| Food/Water/Snacks | €20 |
| SIM Card | €20 |
| Total | ~€355–410 |
Winter 2-Day (Group + Rental Gear)
| Expense | Cost |
|---|---|
| Flights | €150 |
| Private Taxi | €40 |
| Guide Package | €220 |
| Gear Rental | €40 |
| Accommodation | €30 |
| Extras | €50 |
| Total | ~€550–550 |
Toubkal vs Alpine 4,000m Cost Comparison
| Expense Category | Mount Toubkal | Typical Alpine 4,000m |
|---|---|---|
| Guide Cost | €150–400 | €700–1,500 |
| Hut Fees | Included | €50–90 per night |
| Lift Pass | Not needed | €50–100 |
| Equipment Rental | €30–40 | €60–150 |
| Total Estimate | €350–600 | €1,200–2,000+ |
Mount Toubkal is often 30–60% cheaper than a comparable Alpine 4,000m experience.
Hidden Costs to Keep in Mind
| Hidden Cost | Typical Amount |
|---|---|
| ATM Fees | €3–6 per withdrawal |
| Water Bottles | €2 each |
| Tips | €10–30 |
| Extra Night | €20–40 |
| SIM Card | €15–20 |
Always budget a small buffer.
Final Budget Takeaway
Mount Toubkal offers:
- Real altitude (4,167m)
- Winter alpine exposure
- Crampon experience
- Guided structure
For a fraction of Alpine pricing. It’s one of the best cost-to-experience ratios in mountaineering.
Final Summary: Who Mount Toubkal Is (And Isn’t) For
Mount Toubkal is often marketed as “just a hike.” That’s technically true. But it’s incomplete. At 4,167 meters, Toubkal is high enough to:
- Test your fitness
- Expose weak pacing
- Reveal how your body handles altitude
- Teach you respect for long descents
It’s not technical mountaineering. But it is a real mountain.
Who Toubkal Is Perfect For
Toubkal is an excellent choice if you:
- Want your first 4,000m summit
- Are preparing for bigger Alpine objectives
- Want to test crampons in winter
- Want guided structure without glacier risk
- Want high-altitude exposure without Alpine pricing
- Are curious how your body handles 4,000m
In winter especially, it gives you:
- A real alpine start
- Moving uphill in the dark
- Snow-covered terrain
- Crampon experience
- Long summit days
- Serious vertical gain
Without crevasses.
Without rope teams.
Without technical climbing.
It’s alpine — simplified.
Who It’s Not Ideal For
Toubkal is not ideal if you:
- Struggle with long uphill hikes
- Have zero endurance base
- Refuse to start at 4:30 AM
- Expect luxury hut comfort
- Underestimate altitude
It’s achievable. But it punishes underestimation.
What It Taught Me
For me, Toubkal was revealing. I learned:
- My legs can handle big vertical — but the descent matters more than I thought
- I don’t acclimatize particularly fast
- Pacing matters more than ego
- Winter weight changes everything
- The summit is only halfway
And that information is invaluable. It’s far better to learn these lessons here than on a bigger, glaciated Alpine peak.
Get the Complete Toubkal Packing Checklist (Free)
Planning your climb?
I’ve turned the full gear section of this guide into a printable Toubkal Packing Checklist — including:
- ✅ Summer gear list
- ✅ Winter gear list (with crampons & B2 setup)
- ✅ Summit-day packing sheet
- ✅ Refuge essentials
- ✅ Weight-saving tips
So you don’t forget anything important — and don’t overpack either.
👉 Enter your email below and I’ll send it straight to you.
No spam. Just mountain planning done properly.