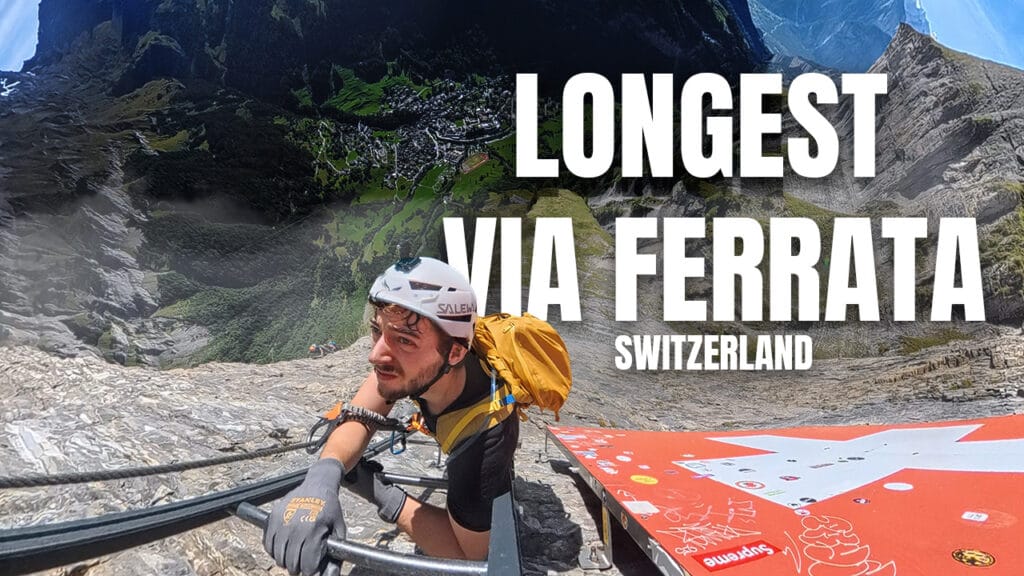
You have seen the videos: people climbing ladders, crossing suspension bridges and moving across exposed mountain walls while clipped to a steel cable. Now you want to try your first via ferrata. Via ferrata is one of the most accessible ways to experience exposed mountain terrain without first becoming an experienced rock climber. But accessible does not mean risk-free. The steel cable does not automatically make the mountain safe. It simply makes otherwise difficult terrain climbable.
Choosing a route that is too difficult, using the wrong equipment or underestimating the approach and descent can quickly turn an exciting day into a stressful or dangerous experience.
- How to build up your via ferrata experience
- Via ferrata gear for beginners
- What else should you pack?
- How to use a via ferrata set
- Basic climbing technique
- Check the mountain weather
- Research the complete route
- When should you turn around?
- A simple plan for your first via ferrata
- What should your second via ferrata be?
- Final advice before your first via ferrata
- Get the free First Via Ferrata Packing List and Quick Guide
The short answer: how should you try via ferrata for the first time?
For your first via ferrata, I recommend:
- Choose an A- or B-rated beginner route.
- Rent a helmet, harness and certified via ferrata set.
- Go with an experienced person or book a guide.
- Practise using the equipment before entering exposed terrain.
- Research the approach, route, escape options and descent.
- Check the mountain weather and current route conditions.
- Start early and bring enough water, food and clothing.
You do not need to buy an entire climbing setup before discovering whether you actually enjoy via ferrata. You also do not need exceptional upper-body strength for an easy route. Choosing an appropriate route, moving efficiently and remaining calm around exposure matter much more.
What is a via ferrata?

A via ferrata is a protected mountain route fitted with a permanent steel cable.
Depending on the route, you may also encounter:
- Metal ladders
- Steps and pegs
- Suspension bridges
- Exposed traverses
- Natural rock climbing
- Tunnels and caves
- Steep hiking or scrambling sections
You wear a climbing harness connected to a special via ferrata set. The set has two arms with carabiners and an energy absorber. Both carabiners attach to the steel cable. When you reach an anchor, you transfer them to the next cable section one at a time. Via ferrata sits somewhere between hiking, scrambling and rock climbing. Easy routes may feel like exposed hiking with additional protection. Difficult routes can include long vertical or overhanging sections requiring considerable strength, technique and experience.
Is via ferrata safe for beginners?
An easy via ferrata can be suitable for a reasonably fit beginner when the route, weather and equipment are appropriate.
Problems often develop because several smaller mistakes begin to stack:
- The route is harder than expected
- The group starts too late
- Someone becomes frightened by the exposure
- The approach takes longer than planned
- The group runs low on water
- The weather changes
- The descent is more difficult than expected
- A tired climber starts making mistakes with the carabiners
A short beginner route completed with an experienced partner is very different from entering a long alpine via ferrata without knowing how you react to heights. For your first time, I recommend going with someone who has genuine via ferrata experience or booking a qualified guide.
A guide or experienced partner can:
- Help you select a suitable route
- Check that your equipment fits correctly
- Teach you how to use the carabiners
- Correct inefficient climbing technique
- Help if you freeze or panic
- Manage spacing between climbers
- Recognise when the group should turn around
Watching online tutorials is useful preparation, but it is not a replacement for hands-on instruction.
Are you physically ready for your first via ferrata?
You do not need to be an elite athlete for an easy A- or B-rated route.
As a rough beginner benchmark, you should be able to:
- Hike for at least two to three hours
- Complete approximately 300 to 500 metres of elevation gain
- Climb several flights of stairs without needing a long recovery
- Climb a ladder confidently
- Move over uneven terrain without frequently losing your balance
- Support part of your body weight with your arms for several seconds (10)
- Continue operating your equipment while slightly tired
A practical upper-body self-check is being able to hang from a bar for approximately 10 seconds and complete around five controlled push-ups. These are not official tests. They are simply useful indicators that you can support yourself briefly if your feet slip or you encounter a steeper section. On an easy route, most of the climbing should come from your legs. If your forearms become exhausted immediately, you are probably gripping too hard or pulling yourself up the steel cable instead of using your feet.
Are you mentally ready for the exposure?

You do not need to be fearless. Feeling nervous before stepping onto an exposed ladder or bridge is completely normal. The important question is whether you can continue making controlled decisions while you feel nervous.
You should be able to:
- Listen to instructions
- Move one step at a time
- Operate both carabiners correctly
- Communicate when you need a break
- Avoid rushing because someone is waiting behind you
- Turn around when the route or conditions are not right
If standing near an exposed edge makes you completely freeze or panic, begin with a short practice course close to the ground. Do not discover how your body reacts to severe exposure halfway across a cliff.
How difficult should your first via ferrata be?
Via ferrata grading systems vary between countries and guidebooks. In German-speaking regions, routes are commonly graded from A to F or from K1 to K6. Other countries may describe routes as easy, moderately difficult, difficult or extremely difficult.
A simplified overview is:
- A or K1: Easy protected paths with limited climbing
- B or K2: Beginner-friendly climbing with ladders, steps and some exposure
- C or K3: Steeper, more exposed and potentially strenuous terrain
- D or K4: Difficult and physical climbing requiring experience
- E or K5: Very difficult, often vertical or overhanging
- F or K6: Extremely difficult and intended for experts
For your first via ferrata, choose an A- or B-rated route. A route with a maximum difficulty of C may be suitable when you already have climbing or scrambling experience, are comfortable with heights and are accompanied by someone experienced. Do not select a route based only on its grade. The grade normally describes the hardest technical section. It may not accurately represent the commitment of the entire day.
You should also consider:
- Total duration
- Length of the approach
- Length and difficulty of the descent
- Total elevation gain
- Amount of exposure
- Altitude
- Escape options
- Difficult sections that cannot be avoided
- Expected crowds
- Current route conditions
A short C-rated route beside a valley can be more manageable than a long B-rated alpine route with a complicated descent.
How to choose the right first route
Your first via ferrata should ideally have:
- A maximum grade of A or B
- A short and straightforward approach
- A total duration of approximately two to four hours
- Limited commitment
- At least one possible escape route
- A simple descent
- No snow or glacier crossings
- Equipment rental or guiding available nearby
- Stable, dry weather
Look for a route described specifically as suitable for beginners. Do not rely solely on a comment from an experienced climber saying that the route is “easy.” Study the route topo before leaving.
Identify:
- Where the most difficult section occurs
- Whether easier variants are available
- Where the escape routes are
- How long the protected section takes
- What happens after the final cable
- How long the descent takes
- Whether you need to catch a cable car
Your adventure does not end when you unclip from the final cable. You still need enough water, food, energy, concentration and daylight to complete the descent.
Use a via ferrata database to find suitable routes
Websites such as Bergsteigen.com and Via-Ferrata.de are useful for discovering via ferratas near your destination. Both are only available in German, but using google translate can help you with this. Both of these sites remain the most complete sources in the alps. You can search by country or region, browse routes on a map and filter the results by factors such as difficulty and elevation gain. Bergsteigen.com, for example, allows users to filter its via ferrata database by grade, climbing height and region. Once you find a possible route, open the full description and check more than just the headline difficulty.
These websites commonly list details such as:
- Difficulty grade
- Approach time
- Time spent on the via ferrata
- Total tour duration
- Elevation gain
- Length of the protected route
- Descent time and route
- Wall direction or exposure
- Recommended season
- Route topo (paywall on Bergsteigen)
- Maps or GPS information (paywall on Bergsteigen)
- Escape routes and easier variants
- Parking and access information
- Recent comments or condition updates
For your first via ferrata, use the filters to look for an A- or B-rated route in the area you are visiting. A route with short C-rated sections may also be appropriate if you already have climbing or scrambling experience and are going with someone experienced. Do not choose a route based only on its grade. Open the topo and study where the hardest section appears, how long it lasts and whether it can be avoided. You should also compare the time on the via ferrata with the duration of the complete outing. A route may contain only one hour of protected climbing but still require several hours for the approach and descent. Use these websites to create a shortlist, then confirm the current route status through an official tourism website, local guide company or route operator. Recent comments can be helpful, but they are not a substitute for an official closure or conditions update.
How to build up your via ferrata experience
Progression should involve more than increasing the difficulty grade.
A sensible progression develops four abilities:
- Efficient movement
- Comfort with exposure
- Physical endurance
- Decision-making in mountain terrain
Stage 1: Learn the equipment
Begin on a short A- or B-rated route or a purpose-built practice course.
Your goals are to learn how to:
- Clip smoothly
- Pass cable anchors
- Always remain connected
- Move without constantly pulling on the cable
- Communicate with other climbers
- Maintain appropriate spacing
Your first route should feel controlled. It should not feel like a survival challenge.
Stage 2: Increase the duration
Once you are comfortable using the equipment, choose a longer B- or B/C-rated route. This teaches you how your body and concentration respond after several hours of clipping and climbing.
Pay attention to:
- Forearm fatigue
- Calf fatigue on ladders
- Your ability to eat and drink while exposed
- Whether your clipping becomes less accurate when tired
- How well you manage the descent
Stage 3: Add steeper climbing
After several comfortable beginner routes, progress towards C-rated terrain. This is where climbing technique becomes more important. You may encounter vertical sections with fewer artificial footholds and a greater need to use the natural rock. Do not move directly to D-rated routes simply because you survived one short C section. You should first be able to complete several C-rated routes with control, without severe arm pump, panic or complete exhaustion.
Stage 4: Build alpine experience
Long alpine via ferratas add challenges that cannot be represented by one difficulty grade:
- Altitude
- Fast-changing weather
- Snow
- Long approaches
- Complicated descents
- Limited escape options
- Several hours of continuous exposure
Before attempting major objectives such as the Daubenhorn or a hut-to-hut via ferrata tour, you should already have completed several difficult via ferratas and at least one long alpine day. The goal is not to find the hardest route you can survive. The goal is to build enough experience that you can continue making good decisions when tired, exposed and under pressure.
Via ferrata gear for beginners

For your first via ferrata, you do not need to buy an expensive collection of specialist equipment.
In most popular via ferrata destinations, you can rent the three essential pieces as a package:
- A climbing helmet
- A climbing harness
- A certified via ferrata set
Renting is usually the best option for your first trip. It allows you to try the sport before spending hundreds of euros on equipment. You should still understand what you are wearing and inspect everything before leaving the rental shop.
1. Climbing helmet
Your helmet protects you from falling rocks, dropped equipment and impacts against the rock. Use a proper climbing or mountaineering helmet. Look for the EN 12492 or UIAA 106 certification. Do not assume that a cycling, ski or ordinary construction helmet provides the same protection. These helmets are designed and tested for different environments and impact scenarios. Some professional helmets carry more than one certification. Always check the label instead of judging a helmet by its shape.
The helmet should:
- Sit level on your head
- Remain secure when you move
- Not slide over your eyes
- Have its chinstrap fastened
- Be free from cracks or visible damage
Put the helmet on before entering terrain where people are climbing above you, not only when you reach the first cable.
Specific helmet recommendations
Budget: Decathlon Simond Rock
A straightforward and affordable climbing helmet for someone who wants certified protection without spending too much.
Mid-range: Petzl Boreo or Black Diamond Half Dome
Durable all-round helmets suitable for via ferrata, climbing and general mountain use. These are good options if you value robustness and expect to use the helmet regularly.
High-end: Petzl Meteor
A lighter and better-ventilated option that becomes more comfortable during warm approaches and long routes.
For beginners, fit and correct adjustment matter more than saving a small amount of weight.
2. Climbing harness
A normal sit harness used for rock climbing is suitable for most adult via ferrata users. The waist belt should sit securely above your hips. It must be tight enough that it cannot slide down but should not restrict your breathing or movement.
Check that:
- The waist belt is correctly closed
- The leg loops are properly adjusted
- No clothing is caught inside the buckles
- The via ferrata set is attached to the correct point
- Adjustable buckles are secured according to the manufacturer’s instructions
Ask the rental shop or your guide to check the fit.
Specific harness recommendations
Budget: Decathlon Simond Rock
An affordable entry-level harness suitable for occasional via ferrata use.
Mid-range: Black Diamond Momentum
A comfortable all-round harness that can also be used for indoor and outdoor climbing.
High-end: Petzl Sitta
A lightweight and compact harness for people who prioritise minimal weight and pack size.
For most beginners, the budget or mid-range option is more than sufficient.
3. Certified via ferrata set
A modern via ferrata set contains:
- Two lanyard arms
- Two automatic-locking carabiners
- An energy absorber
- An attachment loop for the harness
The energy absorber is designed to reduce the forces generated during a fall. A normal sling, piece of rope, homemade lanyard or two standard carabiners are not substitutes for a certified via ferrata set.
Specific via ferrata-set recommendations
Budget: Salewa Premium Attac
A robust, straightforward set offering the essential features needed for a beginner route.
Mid-range: Petzl Scorpio Eashook
The ergonomic carabiners are comfortable to operate repeatedly, which becomes useful on routes with many cable anchors.
High-end: Petzl Scorpio Eashook SW
This model includes a swivel that helps prevent the lanyard arms from becoming twisted and tangled while you move.
The more expensive set can improve comfort, but it does not change the basic safety rule:
Check the permitted weight range
Every via ferrata set has a permitted user-weight range.
This generally includes the combined weight of:
- Your body
- Your clothing
- Your backpack
- Everything inside the backpack
Check the instructions for the exact model you are renting or buying. This is especially important for light children and heavier adults carrying a substantial backpack.
Inspecting rented equipment
Before leaving the rental shop:
- Open and close both carabiners
- Confirm that both gates close automatically
- Inspect the arms for cuts or heavy wear
- Check that the energy absorber has not deployed
- Ask how the set attaches to the harness
- Adjust the helmet and harness
- Ask the staff to perform a final equipment check
Do not wait until you reach the mountain to work out how everything fits together.
4. Gloves
You do not need expensive specialist gloves for your first via ferrata. Thin construction or gardening gloves with a grippy palm can work perfectly well. They protect your hands from:
- Rough steel cable
- Broken individual wires
- Blisters
- Hot metal in direct sunlight
- Cold metal in poor weather
Choose close-fitting gloves that still allow you to operate the carabiners easily. Avoid bulky work gloves because they can reduce your dexterity.
Specific glove recommendations
Budget: thin construction or gardening gloves
A close-fitting pair with a grippy palm is adequate for most beginners.
Mid-range: Black Diamond Crag
A purpose-made climbing glove offering improved durability and a more precise fit.
The inexpensive option is completely sufficient for most first-time users.
5. Footwear
You do not need climbing shoes.
Wear hiking boots or approach shoes with:
- Good grip
- A secure heel
- Enough stiffness to stand on ladder rungs
- A sole capable of edging on small rock steps
- A comfortable fit for the approach and descent
The best shoes are usually the ones you already trust on long hikes. Never attempt your first via ferrata in brand-new footwear.
Specific footwear recommendations
Budget: Salomon X Ultra boot
A stable hiking option with more support and stiffness than a soft running shoe.
Mid-range: La Sportiva TX4 or Scarpa Mescalito
Approach shoes provide precise foot placement and good grip on rock while remaining comfortable enough for hiking.
High-end or alpine option: Scarpa Ribelle Lite
A stiffer mountain boot suitable for more serious alpine objectives and potentially compatible with crampons, depending on the exact model.
This level of boot is unnecessary for most easy beginner routes. (mostly reserved for routes that mix mountaineering & Via ferrata)
Soft trail-running shoes may work on a short, dry and easy route, but soft soles can become uncomfortable when you spend a long time standing on narrow ladder rungs.
6. Backpack
Use a compact backpack with a slim profile. Approximately 15 to 25 litres is sufficient for most beginner day routes. The backpack should sit close to your body and should not pull you backwards while climbing. Secure any loose straps. Avoid hanging bottles, clothing or equipment loosely from the outside where they can catch on the rock or steel cable.
Specific backpack recommendations
Budget: Decathlon MH500
An affordable hiking pack with sufficient space for an ordinary day route.
Mid-range: Deuter Speed Lite 23
A lightweight, slim day pack that works well for both hiking and via ferrata.
High-end: Mammut Trion Light 28
A more technical mountain pack for longer objectives. Pack it lightly because a heavy backpack makes exposed climbing considerably more tiring. For a short beginner route, you do not need a 30- or 40-litre mountain backpack.
7. Clothing
Wear clothing that allows unrestricted movement and can adapt to changing mountain conditions.
Base layer
Choose a breathable, fast-drying shirt.
Recommended options:
- Budget: Decathlon synthetic base layer
- Mid-range: Patagonia Capilene or Odlo Performance
- High-end: Icebreaker or Ortovox merino blend
Avoid heavy cotton. Cotton absorbs sweat and can become cold when you stop moving.
Mid layer
Carry a light fleece or insulating layer, even when the valley feels warm.
Recommended options:
- Budget: Decathlon synthetic fleece
- Mid-range: Patagonia R1 or Arc’teryx Delta
- High-end: Ortovox Grid Fleece or a lightweight Alpha Direct layer
Wind and weather protection
An exposed mountain wall can feel much colder than the approach, particularly when you are waiting behind another group.
Recommended wind layers:
- Budget: Lightweight Decathlon windbreaker
- Mid-range: Patagonia Houdini
- High-end: Arc’teryx Squamish
A windbreaker is not the same as a waterproof jacket. Carry a waterproof shell when the overall mountain day justifies it—but do not start a via ferrata when thunderstorms or significant rain are forecast.
Trousers
Wear flexible hiking trousers that allow you to raise your knees comfortably.
Shorts can work on easy summer routes, but trousers offer more protection from:
- Sharp rock
- Scraped shins
- Metal ladders
- Sun exposure
- Cold wind
Do beginners need a rest lanyard?
A rest lanyard allows a climber to connect more closely to a rung or suitable attachment point and sit back into the harness. This can be extremely helpful on long, steep routes where queues force you to wait in vertical terrain. It is not automatically required for a short A- or B-rated beginner route.
Do not improvise a rest system without instruction. An experienced person should show you:
- What equipment is appropriate
- Where it attaches to the harness
- Where it may be connected
- Which carabiner to use
- How to avoid interfering with the energy absorber
- Why it never replaces the via ferrata set
Some via ferrata sets include a dedicated short resting arm or attachment point. Read the manufacturer’s instructions for your exact model.
Do beginners need crampons or microspikes?
Not for an ordinary beginner route in summer conditions. Crampons or microspikes are only relevant when the approach or descent crosses snow or ice. A route requiring crampons, glacier travel or complicated snow crossings is normally not an appropriate first via ferrata unless you are accompanied by a qualified guide. Always check current conditions rather than assuming that the route is snow-free because it is summer.
What else should you pack?
The helmet, harness and via ferrata set are only part of your equipment.
Water
Calculate your water for the complete day:
- The approach
- The via ferrata
- Waiting time
- The descent
As a general starting point, plan approximately 500 to 750 millilitres of water per hour of activity.
Adjust this according to:
- Temperature
- Sun exposure
- Altitude
- Route length
- Your personal needs
- Whether reliable refill points exist
In hot weather or on a route with no shade, you may need more. However, several litres of water also add significant weight. A hydration bladder such as a CamelBak can make it easier to drink regularly without repeatedly removing your backpack. Do not rely on mountain streams or glacier runoff unless you have confirmed that water is available and have a suitable purification method.
Food
Bring food that is easy to eat during short stops or while securely clipped in.
Good options include:
- Gummies or energy chews
- Soft bars
- Sandwiches
- Bananas
- Dried fruit
- Salty snacks
- Small portions eaten regularly
Hard, dry bars often become difficult to eat when you are nervous or dehydrated. Do not plan to eat nothing all day and then have a large lunch at the summit. Appetite can decrease when you are exposed or stressed. Bring food you know you can eat even when you do not feel hungry.
Navigation and emergency equipment
Carry:
- A fully charged phone
- The route downloaded for offline use
- A power bank
- A small first-aid kit
- Blister plasters
- An emergency blanket
- A headlamp
- Sunscreen
- Sunglasses
- Personal medication
- Emergency and insurance information
A headlamp may seem unnecessary for a short route, but delays, queues or navigation mistakes can turn an afternoon descent into an evening one. Tell someone which route you are doing and when you expect to return.
How to use a via ferrata set
This article does not replace hands-on instruction. Practise using the equipment on safe ground with a guide or experienced climber before entering exposed terrain.
Always remain attached
The fundamental rule is: Always keep at least one carabiner attached to the cable.
When you reach an anchor:
- Stop in a stable position.
- Move the first carabiner to the next cable section.
- Confirm that it has closed.
- Move the second carabiner.
- Confirm that it has closed.
- Continue climbing.
Never disconnect both carabiners at the same time.
One person per cable section
Only one person should normally occupy each cable section between two anchors. If two climbers share a cable section and the upper climber falls, they can collide with the person below. Wait until the next section is free before moving forward. Do not climb directly underneath someone. Leave enough room to avoid being struck by:
- The climber
- Their backpack
- Dropped equipment
- Loose stones
Never obstruct/bypass the energy absorber
Do not connect an unused lanyard arm back to a random point on your harness unless the manufacturer provides a specific approved attachment for that purpose. Incorrect connection can prevent the energy absorber from deploying correctly. Follow the instructions for your exact via ferrata set.
A via ferrata set is emergency protection
Do not treat falling as a normal part of via ferrata. Unlike sport climbing, a fall can involve sliding down the steel cable and passing metal steps or rock before reaching an anchor. Even when the energy absorber works correctly, a via ferrata fall can cause serious injuries. The equipment is there in case something goes wrong. It is not there so you can deliberately test your limit.
Basic climbing technique
Efficient technique will save more energy than upper-body strength.
Use your legs
Your legs are stronger than your arms. Push through your feet and use your hands mainly for balance. Avoid pulling your entire body up the cable unless necessary.
Keep your arms relaxed
Straight or slightly bent arms consume less energy than permanently flexed elbows. Grip securely, but do not squeeze the cable as hard as possible.
Move deliberately
Before moving:
- Identify your next foothold
- Check your balance
- Move one limb at a time
- Keep your hips reasonably close to the rock
- Avoid sudden movements
Clip from a stable position
Whenever possible, place both feet securely before transferring your carabiners. Do not wait until your arms are exhausted before clipping past an anchor. Move the carabiners early enough that the arms of the set do not become tangled behind you.
Rest before you are exhausted
If you begin developing forearm pump:
- Find a stable position
- Straighten your arms
- Shake one hand out at a time
- Slow your breathing
- Tell your group that you need a moment
Do not continue until you can barely hold on.
Check the mountain weather
Thunderstorms are an absolute reason not to start a via ferrata. You are moving through exposed terrain while connected to a long steel cable. Rain also makes rock, metal ladders and the approach considerably more slippery.
Check:
- Thunderstorm probability
- Rain
- Wind speed and gusts
- Temperature at route altitude
- Overnight freezing
- Snow on the approach or descent
- Current route closures
Do not rely only on a weather app showing a sun symbol for the nearest town. Conditions several hundred metres higher may be completely different. Strong wind can make suspension bridges and exposed traverses much more intimidating. Extreme heat can also create problems on routes with little shade.
Starting early generally gives you:
- Cooler temperatures
- More daylight
- Fewer crowds
- More time for delays
- A larger margin before afternoon storms
Research the complete route

Before travelling, answer these questions:
- Where can we park?
- How long is the approach?
- Where does the protected route begin?
- What is the hardest section?
- Can that section be avoided?
- Where are the escape routes?
- How long does the via ferrata take?
- How long and difficult is the descent?
- Is the descent clearly marked?
- Is the route currently open?
- Are there seasonal restrictions?
- Is equipment rental available?
- Do we need to catch a final cable car?
- What emergency number applies locally?
Download the route or GPX track before leaving. A route that takes two hours on the steel cable may still become a five- or six-hour day after adding the approach, queues, breaks and descent.
When should you turn around?
Turning around is not failure. Do not start—or stop early—when:
- Thunderstorms or rain are approaching
- The route is officially closed
- Your equipment does not fit correctly
- Someone is already exhausted
- Someone freezes and cannot continue safely
- You are significantly behind schedule
- You have insufficient food or water
- The approach feels much harder than expected
- The first section already feels overwhelming
- The route is much more crowded than expected
- You cannot identify a safe way to complete the descent
When a route has an escape option, decide before the difficult section whether everyone should continue. Do not allow travel time, money already spent or pressure from friends to make the decision for you. The mountain will still be there another day.
A simple plan for your first via ferrata
Before the trip
- Select an A- or B-rated route
- Book a guide or find an experienced partner
- Reserve rental equipment
- Study the route and descent
- Download the map offline
- Check the weather and current route status
- Pack water, food and layers
- Tell someone your plan
At the rental shop
- Adjust the helmet and harness
- Learn how the set attaches to the harness
- Test both carabiners
- Ask about the permitted weight range
- Inspect the energy absorber
- Confirm the equipment return time
At the start
- Put your helmet on before entering rockfall terrain
- Complete a partner check
- Practise clipping before reaching exposure
- Begin slowly
- Maintain one person per cable section
- Drink and eat before you feel depleted
- Keep checking the weather
- Turn around when something feels wrong
After the route
Ask yourself:
- Was I comfortable with the exposure?
- Did I operate the carabiners confidently?
- Where did I become tired?
- Did I rely too heavily on my arms?
- Did I carry enough water and food?
- Was the approach or descent harder than expected?
- Would I repeat this difficulty comfortably?
Use those answers—not your ego—to select your next route.
What should your second via ferrata be?
Do not immediately jump from B to D because your first route felt easy. Choose another route at a similar grade with one new challenge:
- A longer duration
- Slightly more exposure
- A few short C-rated sections
- A longer approach
- A more alpine setting
Change one variable at a time. Once you have completed several C-rated routes comfortably, you can begin considering longer and more difficult objectives. Advanced routes such as the Daubenhorn require much more than climbing strength. They demand experience with sustained exposure, pacing, queues, hydration, difficult decisions and descending while tired. Build towards these objectives gradually.
Final advice before your first via ferrata
Your first via ferrata does not need to be the hardest, highest or most exposed route you can find. The goal is to finish thinking:
“I want to do that again.”
Choose an easy route. Rent the correct equipment. Go with someone experienced. Start early and respect the conditions. There will always be a harder route waiting when you are ready.
Get the free First Via Ferrata Packing List and Quick Guide
Preparing for your first via ferrata should not mean searching through ten different websites the evening before you leave. I have created a free beginner preparation pack containing:
- A printable via ferrata packing list
- The essential equipment checks
- A one-page carabiner and safety guide
- A route-planning checklist
- Food and water reminders
- The most important beginner mistakes to avoid
- A final checklist for the morning of your climb
Enter your email below and I will send the complete pack directly to your inbox.
No spam—just practical mountain guides, safety advice and occasional route inspiration to help you prepare for your next adventure.